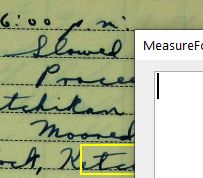
Dynamically position a dialog

No need to apologize for the clutter. As you say, the system is new.

I looked at Andrew Pitonyak’s listing 5.8.4.

I tried using this:

Dim aPosition As New com.sun.star.awt.Point
aPosition.X = 2540
aPosition.Y = 2540
Dlg.setposition(aPosition)

and got this error.
Property or method not found: setposition.

My problem is that I inherited this code from the volunteer who started this project three years ago. For this particular upgrade, I’m at a loss. I’m not sure what the variable nwat in the following code is doing:

*with com.sun.star.awt.PosSize*
  •   	nWhat= .X + .Y*
    
  • end with*
  • Dlg.setPosSize(X, Y, 0, 0, nWhat)*

I know how to position the dialog by setting X and Y. I just can’t position it relative to the active cell. One problem is that the origin for a cell’s position (x,y) is at the top left corner of cell A1. The origin for the dialog (X,Y) is the top left corner of the Calc window (frame ?). I’m not sure about the exact term. Furthermore X and Y are in units that are different from the units for x,y, which are pixels. There seems to be relation between Y and y, the machine’s twips and the value 20. Somehow I have to relate Y to y. There is the ratio between the sizes of the units and the difference in the origins. That difference depends on what headings are at the top of the spreadsheet.

With no column headings, no toolbars and no formula bar, placing the dialog so that the top left corner is at the top left corner of A1, Y=58, y=0.

When showing the formula bar, column headings and the font work toolbar, placing the dialog again at the top left of cell A1, Y=144, and y=0.

The horizontal position is hard-coded, so it is not an issue.

I also have to convert the height of the dialog to the Y units. The dialog was created with height = 106. Dlg.GetPosSize().Height gives me 225. Measuring the height in Y units by getting the position when the top of the dialog is aligned with a cell and then getting the position when the bottom of the dialog is aligned with the cell and taking the difference is 256. Measuring the height of the dialog on the screen is 2.69 inches or 6.83 cm. So, depending on what height units you choose, I have: 106, 225, 256, 2.69 and 6.83.

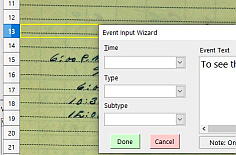
I have no problem maintaining these spreadsheets for most situations, but this one is beyond me. Some of our volunteers would like the Event dialog to be positioned relative to where in the image they are transcribing data, which is a reasonable request. We are transcribing weather and other selected data from Navy and Coast Guard log books, which have been scanned. The images are very large and are set as the spreadsheet background. Selective data are entered using various dialogs etc and the data are then saved in an XML format, and the user moves on to the next image. The weather data being extracted are then being used to improve the climate datasets over the oceans for the years between 1840 and 1955.

This spreadsheet has nine different dialogs and 8,500 lines of macro code so usually I can find code that has some relevance, but not in this case. I have also looked in the two books by Andrew Petonyak, but I have come up with nothing. However, I have found that there is always someone on this forum who has solved a similar problem. I’m hoping there’s someone out there who can figure this one out.

Thank you, @jimk!

Your solution solves the problem of the ratio of “box units” to pixels. There is still the issue of accounting for the width of the Calc headings, toolbars and etc. I.e., if A1 is the Active cell, then your code places the dialog at the top of the Calc window, not at the top of A1.

For my particular set of toolbars and headings, I put the top of the dialog at the top of the active cell by modifying your code with this:

Dlg.setPosSize(point_pixels.X, point_pixels.Y+56*2.54,,, com.sun.star.awt.PosSize.POS)

To place it so the bottom of the box is aligned with the top of the active cell:

Dlg.setPosSize(point_pixels.X, point_pixels.Y+56*2.54 - 256,,, com.sun.star.awt.PosSize.POS)

where 56 is the number of “box units” between the top of the Calc window and the top of cell A1. I got it by getting the Y position of the dialog by placing it at the top of A1. I just need to figure out how to get that value of 56 from the system.

The last step will be to convert the dialog height to the units for Y.

Dlg.GetPosSize().Height = 225. My measurements by getting the Y position when the top and then the bottom of the dialog is aligned with a particular cell is 256 and, on my daughter’s Mac, it was 212.

@mapurves

This may be of help in dealing with the dialog height (also for width).

See → Maximize a dialog in Calc at runtime (OpenBASIC)

Hi Ratslinger,

I loaded your code, and I got the Model.Height of 106 and the Dialog.Height of 225, both of which I knew, but which was good to see confirmed. In theory, moving the dialog up 225 units should place it so the bottom of the dialog is aligned with the top of the active cell. However, a value of 256 is needed. The zoom value is 100%

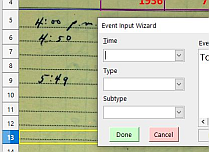
Here is the box, aligned with the top of the active cell.

image.png

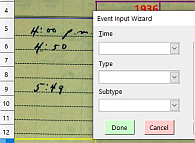
Here it is, moved up 225 units. The bottom of the dialog is below the top of the active cell.

image.png

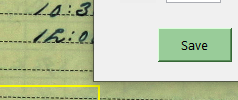
I’m sure it’s a coincidence, but it appears that the top of the active cell aligns with the top of the information box to the right of the Cancel button.

image.png

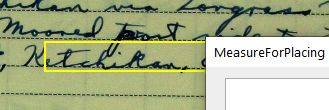
And moved up the 256 units. Now it’s lined up. It needed an extra 31 units. 256/225 = 1.1378. Or, 256/106 = 2.415.

Your code gave 225/106 = 2.12264150943396

image.png

Your code used measurement units APPFont, for this to work I need to use MeasureUnit.MM_100TH.

I’m getting closer, but I’m not there yet.

I have been playing with numbers, and I can get this: 106 * 2.54 * .96 = 258. Is it possible that I have somehow to account inches/mm and my 96 points per inch? I think this may be it.

Thank you,

Michael

I switched to one of our other dialogs, which does not to be positioned, but is much taller at 247 units versus 106. The formula I guessed at in this case does not work. The dialog is positioned about 40 units too high.

For the original dialog it was: BoxH = Dlg.Model.Height*2.54 *.96

For this dialog it needs to be: BoxH = Dlg.Model.Height*2.54 *.90

image.pngimage.png

I give up for today.

Thanks for your help,

Michael

According to LibreOffice: SheetCellRange Service Reference, the cell position is given in 1/100 mm. Also, it looks like the dialog position is in pixels. So, here is what I came up with:

oDoc = ThisComponent
oCell = oDoc.getCurrentSelection() 
oDialog = CreateUnoDialog(DialogLibraries.Standard.Dialog1)

point_mm100ths = oCell.Position
point_pixels = oDialog.convertPointToPixel(_
    point_mm100ths, com.sun.star.util.MeasureUnit.MM_100TH)
oDialog.setPosSize(_
    point_pixels.X, point_pixels.Y,,, com.sun.star.awt.PosSize.POS)
oDialog.execute()

nWhat tells which parameters to use. See LibreOffice: XWindow Interface Reference.

This solution is based on BASIC : How to setup width and height of grid referring to width and height of dialog - #2 by Ratslinger and the link given there.

Conversion methods are described at LibreOffice: XUnitConversion Interface Reference.

1 Like

Nice, concise solution. It seems that it needs to be lengthened a little - subtract the height of the dialog from point_pixels.Y (see the first phrase in the question, “top-bottom”), after checking if the dialog will not crawl off the screen.

@jimk

Thanks for the mention.

Your posted code, at least for me, does not place the dialog at the requested point. Have tried in both Ubuntu 20 and Win 10 now. Have looked for answer to this post on & off now for days. Do not see a satisfactory answer to the problem.

Do not find a direct relation from a cell point to the dialog placement nor any indirect method either.

I use this:

First = Doc.CurrentController.getFirstVisibleRow
point_mm100ths = LogSheet.getCellByPosition(1,First).Position
point_pixels_Y0 = Dlg.convertPointToPixel(point_mm100ths, com.sun.star.util.MeasureUnit.MM_100TH)

’ We get the position for the active cell.
Cell = Doc.getCurrentSelection()
point_mm100ths = Cell.Position
point_pixels_Y = Dlg.convertPointToPixel(point_mm100ths, com.sun.star.util.MeasureUnit.MM_100TH)

’ We calculate the Y position for the dialog.
Y = (point_pixels_Y.Y - point_pixels_Y0.Y)*Zoom/100 + Toolbars - BoxH

I had to account for the height of the toolbars etc manually by placing the dialog so the top of the dialog was at the top of the top row in the spreadsheet. Then

Toolbars = Dlg.Position.Y

I had to get the height of the dialog by aligning the top of the dialog with the top of a particular row and getting Dlg.Position.Y. Then I aligned the bottom of the dialog with the top of the same row and get its position. The height of the dialog was just the difference between the two values.

I did try BoxH = Dlg.Model.Height*2.54 *.96

which worked for this particular dialog, whose Model.Height was 106. I tried it with a dialog with a Model.Height of 247, but that formula did not work. To get the value measured, I needed

BoxH = Dlg.Model.Height*2.54 *.90

I was puzzled why there should be a difference between the ratios for the different sized boxes, but I decided just to go with manual measurements.

I wrote a macro for any users who want to position the dialog relative to the active cell. It posts instructions on the process. The macro opens a similar sized dialog three times: once to position it at the bottom of the toolbars, then once with the bottom and then the top positioned on a gridline. Each time the dialog is opened, it has instructions in the text box. The values for Toolbars and BoxH are then saved. When the Event dialog is called it will then be placed properly. As long as the user doesn’t add or remove any toolbars at the top of the spreadsheet, they would need to do this measuring only once, and then only if they want the Event dialog to open relative to their active cell.

The “code” you present requires some supposition. You should always post an entire picture. For example on the second line:

point_mm100ths = LogSheet.getCellByPosition(1,First).Position

the is nothing to show what “LogSheet” is. Yes I figured it to be the result of getting the sheet.

Also seems to be some manual determinations in there. Have personally gotten further with more automation but still not happy with the results. Trying to position at any X,Y location. Also figured out how to deal with the toolbars. I incorporate “CurrentController → VisibleAreaOnScreen”. This has provided a much better starting point.

But there are a few other glitches.

I’m sorry about not sending the full code. As you surmised:

DialogLibraries.LoadLibrary(“Standard”)
Doc = ThisComponent
Setup = Doc.Sheets.getByName(“Setup”)
LogSheet = Doc.Sheets.getByName(“Log Page”)

As for automating the Toolbars variable:

Toolbars = Doc.CurrentController.VisibleAreaOnScreen.Y + 12

I found this works only if the Calc is maximized. If Calc isn’t at the top of the window, I get an incorrect result. Even with Calc maximized I needed the value 12 to get the dialog to the top of the top row. Without it, the top of the dialog was partway over the column headings.

Sok for want of something else, I’ll have to stick to the manual method for getting the values for Toolbars and BoxH.

When I get the code cleaned up, I’ll send it along.

Here is my code which works to place top left corner of dialog in selected cell (A1 is only one to work accurately at this point in my endeavor). This works without the Calc screen being maximized or at the top or at the left of the screen. Note in my code I have a fixed number of “27” being added (I believe as your “12”). This is actually the height of the Title bar and I am still looking for the place in the code where this value resides. Have some other ideas for the completion of selecting other cells and re-positioning the dialog so bottom lines up and not the top. But that will take some more time.

Sub openDialog2
DialogLibraries.LoadLibrary("MyNewLib")
oDoc = ThisComponent
Dim oCurrentController As Variant
Dim aVisibleAreaOnScreen As New com.sun.star.awt.Rectangle
Dim nY As Long
oCurrentController = ThisComponent.getCurrentController()
aVisibleAreaOnScreen = oCurrentController.VisibleAreaOnScreen
nY = aVisibleAreaOnScreen.Y
nX = aVisibleAreaOnScreen.X
oFrame = oCurrentController.getFrame()
oContainerWindow = oFrame.getContainerWindow()
aOutputSize = oContainerWindow.getOutputSize()
aPosSize = oContainerWindow.getPosSize()
nY2 = aPosSize.Y
oCell = oDoc.getCurrentSelection() 
oDialog = CreateUnoDialog(DialogLibraries.MyNewLib.Buttonsss)
point_mm100ths = oCell.Position
point_pixels = oDialog.convertPointToPixel(_
point_mm100ths, com.sun.star.util.MeasureUnit.MM_100TH)
oDialog.setPosSize(point_pixels.X + nX - aPosSize.X, point_pixels.Y + nY - nY2 + 27,,, com.sun.star.awt.PosSize.POS)
oDialog.execute()
End Sub

Here’s the code. It uses two variables, the value of which I can’t calculate reliably.

DialogLibraries.LoadLibrary(“Standard”)
Dlg = CreateUnoDialog(DialogLibraries.Standard.EventInputWizard)
Doc = ThisComponent
Setup = Doc.Sheets.getByName(“Setup”)
LogSheet = Doc.Sheets.getByName(“Log Page”)
MoveEvent = Setup.getCellRangeByName(“MoveEventWizard”).String

’ We get measured values for BoxH and Toolbars.

BoxH = Setup.getCellRangeByName(“BoxHeight”).ValueToolbars = Setup.getCellRangeByName(“ToolbarHeight”).Value
Zoom = Doc.CurrentController.ZoomValue
X = 10 ’ X position of top left corner of dialog.

’ The position of rows are in pixels from the top of the image.
’ The position of the dialog is from the top of the Calc window.
’ We convert pixels to the box units with convertPointToPixel.
’ We get the position of the top row.
First = Doc.CurrentController.getFirstVisibleRow
point_mm100ths = LogSheet.getCellByPosition(1,First).Position
point_pixels_Y0 = Dlg.convertPointToPixel(point_mm100ths, com.sun.star.util.MeasureUnit.MM_100TH)

’ We get the position for the active cell.
Cell = Doc.getCurrentSelection()
point_mm100ths = Cell.Position
point_pixels_Y = Dlg.convertPointToPixel(point_mm100ths, com.sun.star.util.MeasureUnit.MM_100TH)

’ We calculate the Y position for the dialog.
If (MoveEvent = “Up”) Then
Y = (point_pixels_Y.Y - point_pixels_Y0.Y)Zoom/100 + Toolbars - BoxH
If Y < 5 Then ’ We’re too close to the top. Place it below the active cell.
Y = Y + 1.5
BoxH
End If
Else ’ We place it below the active cell by the indicated number of rows.

ActiveRow = Cell.GetCellAddress.Row
point_mm100ths = LogSheet.getCellByPosition(X, ActiveRow + CInt(MoveEvent)+1).Position
Down = Dlg.convertPointToPixel(point_mm100ths, com.sun.star.util.MeasureUnit.MM_100TH)
Y = (Down.Y - point_pixels_Y0.Y)*Zoom/100 + Toolbars
End If

Dlg.setPosSize(X, Y, com.sun.star.awt.PosSize.POS)
ArgOut = Dlg.Execute()

Maybe let’s try this variant (under the conditions of the original example).
Contains no magic constants. Zoom and the first visible cell of the screen are also taken into account.

' Show dialog near active cell
Sub Dialog4
  Dim oDoc, oControl, oCell, oDialog, oWindow, pos, pos0, posP, posW, zoom
  oDoc = ThisComponent                                       ' document
  oControl=oDoc.CurrentController                            ' view controller
  oCell = oDoc.CurrentSelection().getCellByPosition(0,0)     ' first cell in selection
  With oControl
    pos=oCell.Position
    pos0=oCell.SpreadSheet.getCellByPosition(.FirstVisibleColumn, .FirstVisibleRow).Position
    pos.X=pos.X - pos0.X                                     ' cell position on screen (mm/100)
    pos.Y=pos.Y - pos0.Y
    zoom=.ZoomValue / 100
    oWindow=.frame.ContainerWindow
    posW=oWindow.posSize                                     ' location window on screen
    oDialog = CreateUnoDialog(DialogLibraries.Standard.Dialog1)
    posP = oDialog.ConvertPointToPixel(pos, com.sun.star.util.MeasureUnit.MM_100TH)  ' cell position in points
    oDialog.setPosSize(posP.X * zoom + .VisibleAreaOnScreen.X - posW.X, _
        posP.Y * zoom + .VisibleAreaOnScreen.Y - posW.Y + oWindow.AccessibleContext.Location.Y,,, 3)
    'mri oDialog
    oDialog.execute()
  End With  
End Sub
2 Likes

This has the same issue I have faced. The further down in the rows you go, the more the dialog is lowered from the top of the cell. The same is true or the columns and the left edge of the selected cell.

Also there is no such item as “magic constants”. In my code I had not yet found (as noted) where this setting may be as I was more concerned about the dialog placement. Your code with the “ContainerWindow” resolved my issue without further digging. Thank you.

(sorry for the editing. cannot get space between paragraphs)

I copied your code and gave it a try. Like you, I found two problems:

  1. the dialog’s position isn’t consistent when I move the entire Calc window around the screen; and,
  2. the point_pixels.X value is way too large. For the position of my Active cell, it should be similar to point_pixels.Y.

point_pixels.X 1584

point_pixels.Y 428

It seems to be a problem with Cell.Position.X. Different units maybe???

oCell.Position.X 41920

oCell.Position.Y 11318

The X position should be around 360 given the position of my active cell. Actually, the dialog is placed so that the right-hand side is about 20 units to the left of the right-hand side of the Calc window. If I divide point_pixels.X by about 4.7, the dialog is placed just about where it should be, which is why I think there’s a units problem.

I get these values for my Active cell and the Calc window being maximised.

PPX = point_pixels.X 1584

nX = aVisibleAreaOnScreen.X 33

nX2 = aPosSize.X 0

Here are images with X set at 530 and your code for Y. The first is with Calc maximized, and the second is with the Calc window moved down and to the right.

image.pngimage.png

It is an interesting problem that I have stumbled on. I often find that some problems seem really hard to solve, and they end up being trivial. And there are problems which seem like they would be easy, but they end up being really complicated. This is one of them.

Thank you for trying to solve this.

Did not see those problems you mention. Mine were different. Moving the Calc frame around (or resizing) had no bearing. Also I am working with Ubuntu 20.04.3 with LO v 7.2.0.4

Have not tried Win 10 yet. No sense unless other issues are resolved.

I’m on Windows 10. I tried this on a Mac, but I was at my daughter’s in California at the time, so I have no access to it here. It gave different results, too. I suspected it was a difference in pixel sizes, but I’m not sure.

One more variant.
Another magic constant has appeared. :slightly_smiling_face:
The horizontal shift has almost disappeared.
Tried with different zooms on Windows and Ubuntu.

' Show dialog near active cell
Sub Dialog5
  Dim oDoc, oControl, oCell, oCell0, oDialog, oWindow, pos, pos0, posP, posW, zoom
  oDoc = ThisComponent                                       ' document
  oControl=oDoc.CurrentController                            ' view controller
  oCell = oDoc.CurrentSelection().getCellByPosition(0,0)     ' first cell in selection
  With oControl
    pos=oCell.Position
    oCell0=oCell.SpreadSheet.getCellByPosition(.FirstVisibleColumn, .FirstVisibleRow)
    pos0=oCell0.Position
    pos.X=pos.X - pos0.X - (oCell.CellAddress.Column - oCell0.CellAddress.Column) * 90  ' cell position on screen (mm/100)
    pos.Y=pos.Y - pos0.Y
    zoom=.ZoomValue / 100
    oWindow=.frame.ContainerWindow
    posW=oWindow.posSize                                     ' location window on screen
    oDialog = CreateUnoDialog(DialogLibraries.Standard.Dialog1)
    posP = oDialog.ConvertPointToPixel(pos, com.sun.star.util.MeasureUnit.MM_100TH)  ' cell position in points
    oDialog.setPosSize(posP.X * zoom + .VisibleAreaOnScreen.X - posW.X, _
        posP.Y * zoom + .VisibleAreaOnScreen.Y - posW.Y + oWindow.AccessibleContext.Location.Y,,, 3)
    oDialog.execute()
  End With  
End Sub

Nope!

Go play with your “Magic”

I’m done here.