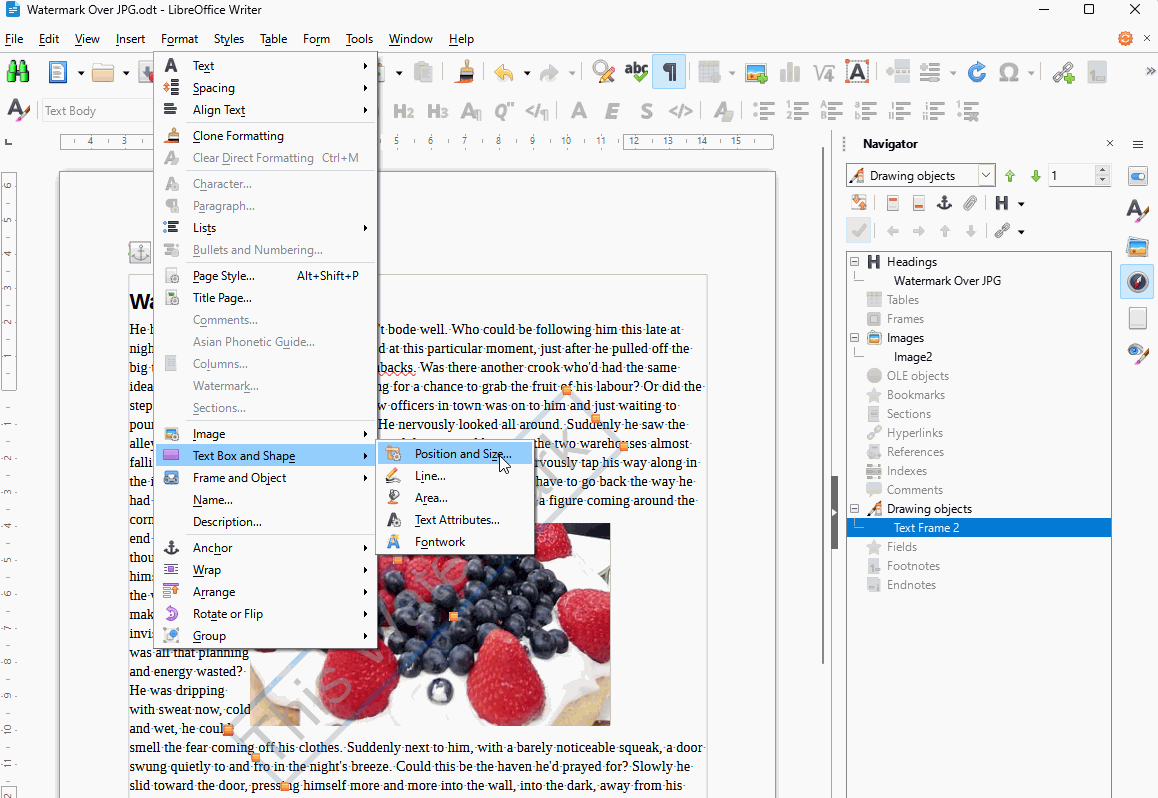
I added a watermark to my document which is fine. But on a page with a picture, the parts of watermark that intersects the picture stays behind the picture . And yes, I tried layers. Sent the picture back, as back one layer or send to back. It doesn’t work. Try yourself you will see. Watermark cannot be displayed on the picture location, unless I miss something here… How can I make the watermark to be visible also on top of the picture?
Can you upload an ODF type sample file with the two embedded images?
Select the image.
Select F4.
In the “Image” dialog, select “Wrap” and Settings “Trough” and check the “In background” box.
Click OK.
Only two options to have watermark in front of image really:
- Set the image as a page background in Page style > Area > Image. You would have to create a special page style for each image which would be time-consuming. Or
- Create the watermark using the same anchoring as Word:
- Add a header to the page if it doesn’t already have one
- Insert a text box and type in the text for your watermark, then select the text and click Format > Character.
- In Font Effects tab:
- Set colour to light grey or as desired.
- Set Transparency to 50% and OK
- In Font tab set Liberation Sans, size 54pt, Regular, or as desired.
- In Font Effects tab:
- Click the outline of the text box to select it, then click Format > Text Box and Shape > Position and Size. In the Rotation tab, set the angle to 45.00°
- In the Sidebar > Navigator, under Drawing objects, double click Text Frame 1 to select the text box and then drag it to your desired position.
- With the text box still selected click Format > Text Box and Shape > Position and Size and in the *Position and Size tab tick the box Protect > Position. OK
Every page of that style will have a watermark and images like jpg can be arranged behind it.
If you need to change the watermark then in the Sidebar > Navigator, under Drawing objects, double click Text Frame 1 to select it and then click Format > Text Box and Shape > Position and Size and in the *Position and Size tab untick the box Protect > Position. OK make changes and protect again.
Watermark Over JPG.odt (76.5 KB)
Your suggestion doesn’t work
EarnestAI your suggestion works thanks (but in the example picture you sent it doesnt , so take a look). One thing… How can I edit the watermark again afterwards? I tried as you said but I couldnt…
And… Can they improve this in next version? It seems this really needs some attention.
To edit the text of the watermark:
- Open Navigator in the Sidebar
- Double click the Drawing Object Text Frame 2 (I did it twice, once to create, the second time to describe the steps. It seems I inadvertently deleted the first one)
- Double click on a letter then select, delete or add text. To change colour or transparency of text, select the text and click Format > Character > Font Effects.
To edit the position or size of the watermark:
- Open Navigator in the Sidebar
- Double click the Drawing Object Text Frame 2
- With the frame selected, click Format > Text Box and Shape > Position and Size. In the tab Position and Size untick the box Position. Change the angle or OK and drag the Text Frame to another position. You might not have to re-protect position as it doesn’t seem to get selected accidentally.
Watermark Over JPG2check.odt (94.8 KB)
[Edit]
It seems the the image goes behind the watermark on re-opening unless the image is anchored As Character
EarnestAi how to anchor an image as character?
Right click on the image?
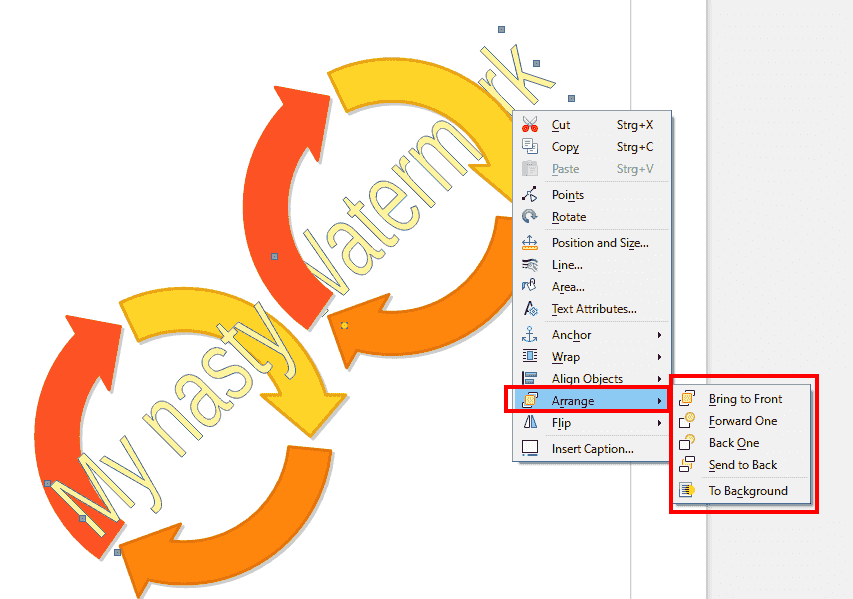
There are some options for images or drawing objects like “send to back”. See my sample file… 
.
MyNastyWatermark.odt (25.8 KB)
.
– Cheers
As I mentioned I already tried send to back
Hrbgr I have no idea what to do in the page you sent, there are loads of info. You can report the bug if you want. Please do. Thanks
My offered sample file exactly shows the wanted result. There are different possibilities of
- “send back” - “to background” - “bring to front” - “forward one” - “back one”
.
I cannot see any bug.
.
You did not mention your LO version, mine was
Version: 7.6.4.1 (X86_64) / LibreOffice Community
Build ID: e19e193f88cd6c0525a17fb7a176ed8e6a3e2aa1
CPU threads: 4; OS: Windows 10.0 Build 19045; UI render: Skia/Raster; VCL: win
Locale: de-DE (de_DE); UI: en-US
… and on LinuxMint same LO version
.
Of course you have to apply the Arrange options to non only one object…
.
@Grantler, I select my picture and then format, arrange and send to back, or back one… it doesnt work… how did you make it work… and what do you mean by “to non only one object”
I have the latest version of libreoffice
You may send the watermark to the foreground and to front (this is not the same step), do that with the other image(s) and send it to the background. So you can change the “level” (or “layer”) also compared to other graphic objects. With “forward one” or “back one” you may proceed in fine-tuning. This works also when you have inserted some text. It is sort of “hand skill”. And pretty easy. 
.
Helpful for you is selecting the watermark either by the Navigator (F5) or using CTRL or SHIFT key when clicking on the object. Change selection of graphic object with TAB key.
.
HTH


