The reason you cannot find the correct line to delete is that the answer you were looking at for the xxx.xml deletion was specific to the situation of the question asked. Your situation, and which line is to be deleted, will probably be different because of table and field names. Since I don’t have any of your information on these specifics, I will present an example. When modifying anything like this it is highly recommended you keep a backup copy of your .odb in case something was incorrectly changed.
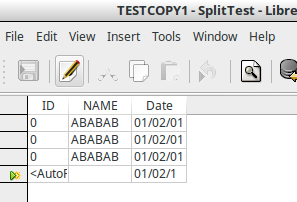
This example works with table named “TESTCOPY1” and the problem field is “ID”. After applying the ALTER statement, as you already have done in the previous post, entering data will appear as:

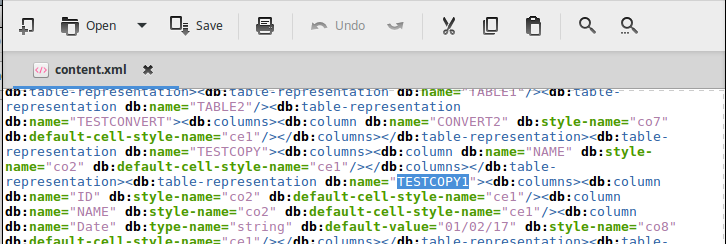
with all the “ID” fields showing “0”. The fix to this is deleting a line in the content.xml file of the .odb. Open the .odb with an archive manager and then open the “content.xml” file with a text editor. In the text editor, use the FIND function from menu (different depending on editor used) and search for the first occurrence of your table name. In the example it is “TESTCOPY1”. Here is the result:
Following this line, you will see the field which is having this problem. In this case it is the first field in the table and is named “ID” as noted previously. Now the key is to select the pertinent information to be deleted. For this example here is the selection:
Note, “TESTCOPY1” is in yellow because of the search and is not part of the highlighted selection. The selection starts with <db:column which is is followed by the section containing the name of the field with the problem and ends before the next <db:column (or <db:columns if this was the last field in the table).
When this is selected just delete (delete key). Save the "content.xml file and if using an archive manager you will get a message to update the archive:
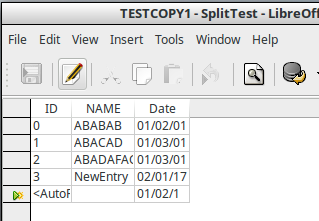
Update and the .odb is fixed. New table entries should now be correctly displayed:

If this answers your question please click on the  (upper left area of answer).


 (upper left area of answer).