automatically/programmatically shrink or draw frame around image/object(s)

Wondering if it is possible to automatically or programmatically shrink/reduce size of frame around an object or alternatively draw a new frame over/around an object then move the object/image into the frame. I would expect this could be done using macros but wonder if there is perhaps a mode or method for achieving this before going there as I don’t have much experience with macros.

I normally use frames everywhere because they are useful for positioning especially with overlapping text, image and drawing object frames. I create my frames first then position images inside frames so I may then anchor the image or object to a frame.

Is possible to do the following automatically or programmatically?


How do we :

  • draw a frame around the image with a minimum frame size (ie image size) + some arbitrary padding/space to allow the frame handles be easily selectable.

  • move image into frame.

  • shrink the frame to a minimum around the frame (image size) + padding/space + anchor the image to frame.

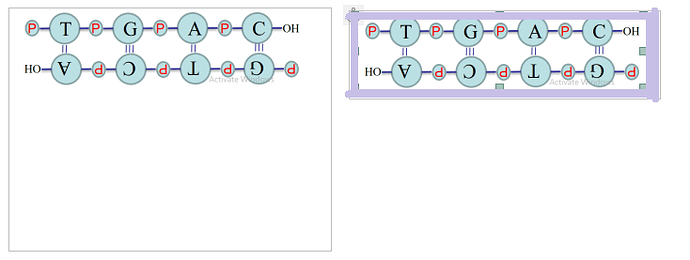
Below you can see an image inside a frame on the left (the frame was drawn with the mouse). On the right the image is inside an appropriately sized frame to encompass the image with a tiny bit of extra space to make selecting the actual frame surrounding the image a bit easier. This additional space is marked in purple/lilac.

This would be important because it would be a big time-saver due to the amount of images I need in writer documents.

There are two flaws in your procedure:

  • you use Insert>Frame>Frame interactively

    This is fine for trials but it freezes all frame attributes to what you drew (and, worse for me, it is akin to direct formatting).

    Instead, use Insert>Frame>Frame. You get a pop-up dialogue (the same you get on an existing frame with right-click and Properties). In the Type tab, there are two check boxes in the Size section named AutoSize, each controlling an axis.

  • a pasted image is itself a frame

    You don’t need to insert the image into a frame unless you need also text to go with the image. The image frame is already at minimal size.

    If this text is a caption, insert first the image, select it and Insert>Caption. This will automatically add the frame around the image and add the caption paragraph.

Padding around a frame is added in the Wrap tab of the frame.

Caution! In the case of a captioned image, there are two frames. Consequently, padding may be added in two different locations. On the outer frame, you set the “separation” between your composite object and surrounding document content; on the inner frame (the image frame), you tune the “distance” between the image and its caption (or other outer frame content) but not between the image and document content, though both settings interact.

You may need to touch both paddings depending on the formatting effect you want.

EDIT

I assume also that many frames/images have the same formatting (same wrap, same autosize, same position type, same padding, …). Turn all these attributes into a custom frame style? You can have as many frame styles you need.

Then, you just double-click on a frame style name in the side-pane to “style”, i.e. to format, your frame/image after insertion.

To show the community your question has been answered, click the ✓ next to the correct answer, and “upvote” by clicking on the ^ arrow of any helpful answers. These are the mechanisms for communicating the quality of the Q&A on this site. Thanks!

In case you need clarification, edit your question (not an answer) or comment the relevant answer.