Can’t print the exact size of my Layout in Draw

My page is set to the exact size I need. In “Page Properties” the “Paper format” is set to “User.”

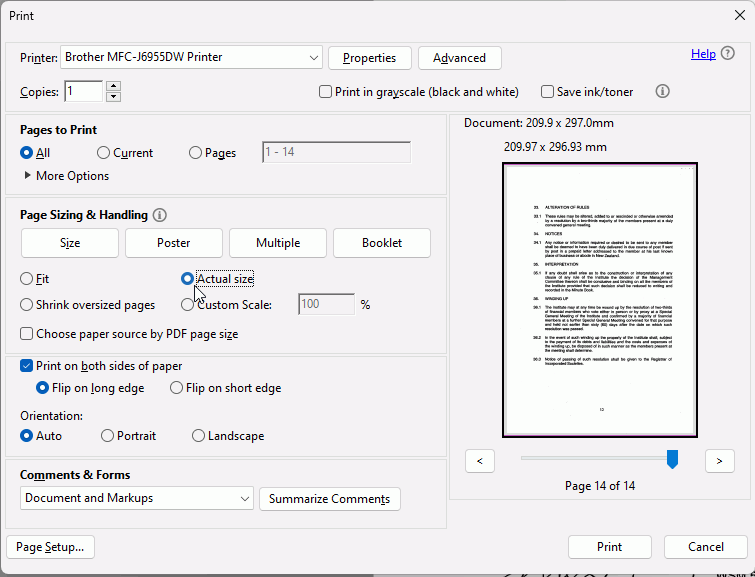
I took it to printer and when she prints on A4 paper size, the drawing gets bigger by about 3 cm in width and 1 cm in height. I asked the printer to print “original size” but her printing software doesn’t seem to have an “original size” setting.

I have to print to A4 because there is no paper size called “User.”

I want the drawing to print exactly the size I set. On A4 paper, that would leave lots of white space on the top, bottom and sides. That’s okay.

I just want to print the exact physical size I specify for the drawing, regardless of the resolution of my monitor and the size of the paper. How can I do this? Thanks for any ideas.

Libre Office Version 7.3.0.3

You could do one of the following

  1. set your paper size to A4 then print
  2. Export to pdf and print the pdf at original size

It sounds like a very singular printer driver but without knowing the printer model or operating system I don’t think specific steps can be given to solve the printer issue

[Edit]
In the Print dialogue, select the LibreOffice tab and under Size select Original size. Note that this is the default setting but if the document has been printed with another setting previously, it might be saved in the document.

Thanks Earnest. I think I forgot to mention that I’m not printing from Libre. I’m exporting the document as PNG or PDF. Then I take it to the printer and she uses whatever program supports PNG and PDF to print it.

I see that when I check the exported PNG in Irfanview, the image properties give the Original Size and Current Size in pixels. Then it gives Print Size (from DPI) like this: 8.3 x 4.9 cm. This is completely wrong, much too small, The image size set in Libre is 26cm length by 7.62 cm height.

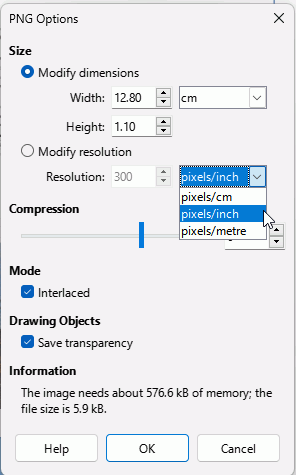
Irfanview is calculating the size based on DPI. When I change the DPI in Irfanview, I can get a size near what I intended. I have no idea what DPI Libre exported the PNG as. The export dialog box just says Pixels per Centimeter, or pixels per inch, not DPI.

I am really confused. I wonder why the first printer I went to printed it at the correct size.

If I set the paper size to A4 it changes the image dimensions. But then when I export it as PDF, it looks proportionate to my intended dimensions. At least on my computer. I guess I have to print it to see if it’s okay.

If you want the same size, then you should export as PDF, it is the printer’s job to print it at the same size as the pdf says it should be, not fit to paper.

The printer might want to crop the paper to your user defined size, for that the printer needs crop marks. You could use this extension, https://extensions.libreoffice.org/en/extensions/show/crop-mark to add the appropriate crop marks. Otherwise you could add your own crop marks manually.

For all usual purposes, you can use the same value Pixels/inch to give DPI , one is intended for screens and one for printing
ExportPngOptions

I cannot replicate that with jpg, png, shape or text box. What format is the image in?

Earnest wrote: “The printer might want to crop the paper to your user defined size, for that the printer needs crop marks. You could use this extension, https://extensions.libreoffice.org/en/extensions/show/crop-mark to add the appropriate crop marks. Otherwise you could add your own crop marks manually.”

I downloaded the crop marks extension but when I try to install it I get this error: https://ibb.co/kgRnnsp9

Earnest, can you suggest how I can make crop marks for my drawing manually? It seems like it should be pretty simple, but I could use some guidance.

To install an extension, click Tools - Extensions to open the extensions dialogue, then click the Add button.

I’suggest to forget about crop marks. Just export to pdf.
.
Imho crop marks are for professional print services and mark where we will cut the paper after printing. And I guess your printer is not some professional offset printer.
If it is just an office with a print-service crop marks may even resize your image (if somebody tries to fit them into A4 instead of cutting before printing).

Earnest, sorry, it seems the image host that I used to show the error is not working. Please see this link for the error that I got from extension manager.
https://freeimghost.net/i/Cropmarks-ext-error-when-I-try-to-install.xrPEUB

Thanks Wanderer, but this file is intended for a professional printer. I created a bleed area that is uneven on each side, and I need to show where I want him to cut.

Maybe I can superimpose a dashed box on my layout that shows the area to be printed? I can’t find a good free option to create crop marks and the ones in Scribus are too confusing for me. I want to drag and drop the crop marks to the exact places i want them.

Seems there should be a way to put a few lines together in Libre Draw and move them to where I want them.

I haven’t chosen a printer yet. Maybe he doesn’t need crop marks. I would rather show him in person where I want him to cut, but I think I should have crop marks in case he needs them. But I don’t want to spend hours and days researching how to make crop marks manually and place them on the layout correctly.

Ignoring the Cropmarks template, you can use Scribus which is a DTP application. Download from https://www.scribus.net/ and install.
I am not familiar with this software as I use inDesign but as far as I can see, this should work

  1. Once installed, using Scribus, open your PDF that you exported from Draw.
  2. With your PDF now displayed, select File > Document Setup.
  3. In the Document Setup pane, click on the “Margins & Bleeds” tab
    1. Under Margins, set them all to 10 mm. Tick Apply Changes to all pages
    2. scroll down to the “Bleeds” section and change all options to 3.0 mm
  4. Scroll down to PDF Export and
    1. under Printer Marks tick all the boxes.
    2. Under Bleed Settings set all the bleeds to 3 mm (I think)
  5. Click OK.
  6. You should now be able to enlarge/replace your images to fill the bleed area too
  7. Go to File > Export > Save as PDF
  8. Select the “Pre-Press” tab, and check
    1. Make sure the Printer Marks are checked
    2. Use Document Bleeds under Bleed Settings.
  9. Rename your file if necessary and save to your desired location

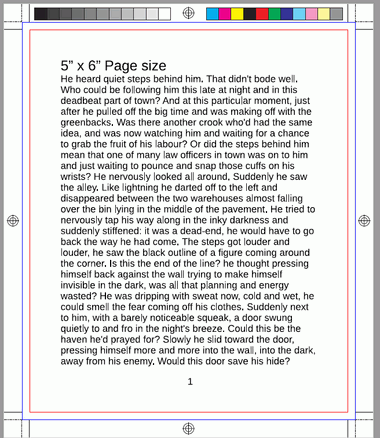
The resulting pdf will show a red inner margin (non-printing hopefully) which is your original finished page size. A blue margin which is the bleed margin. Crop marks in the corner. Plus the other marks
PDFExportedFromScribus