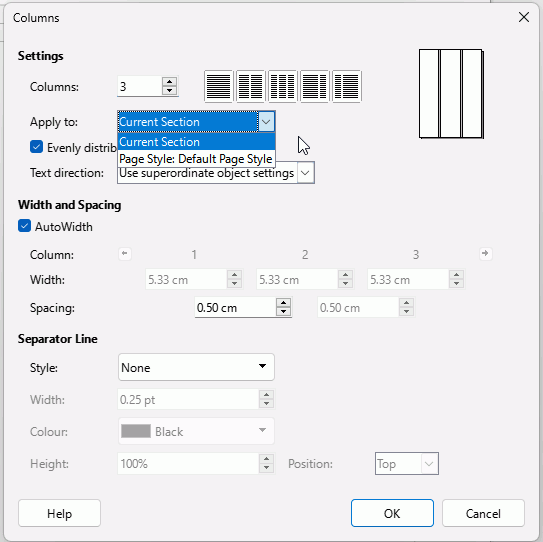
I have several documents I created with three columns of text. Over time, maybe years, I am now going back to these documents to make some slight formatting changes. But when I open the document the number of columns in “Layout; Columns” shows 1, but I have 3 columns displayed. Changing the count to 3 I get 9 columns displayed! Since I want to change the column spacing I am at a standstill. My only solution has been to copy the document and paste it into a new document with the correct formatting. Any solution on how to get the number of columns displayed to match the count in the dialog boxes?
What version of LibreOffice and operating system? Click Help > About LibreOffice then, in the dialogue, click the icon immediately after Version Information to copy to clipboard ready to paste here.
.
Can you provide a sample single document showing the issue? Cheers, Al
Mote that you can set columns in different places. E.g., you may define them as a property of a page style; or a property of a section. The latter method allows you to have different number of columns in different parts even on a single page.
What you experience highly suggests the presence of a section in your page.
Nesting a section in a page results in the “section geometry” being applied to the “container”, i.e. the elementary columns of the page.
In other words, a 3-column section in a 1-column page gives a 3-column layout. If you change the page style to 3-column, you now get a 9-column layout (3-column layout in each page column).
Enable the various visual clues for text boundaries in the |View` menu to see your current “geometry” configuration.
Read carefully the Writer Guide and experiment to understand the relationship between the various layout layers.
I’m using:
Version: 24.8.4.2 (X86_64) / LibreOffice Community
Build ID: bb3cfa12c7b1bf994ecc5649a80400d06cd71002
CPU threads: 6; OS: Windows 11 X86_64 (10.0 build 22635); UI render: Skia/Vulkan; VCL: win
Locale: en-US (en_US); UI: en-US
Calc: CL threaded
I have documents that were created over four years ago to just in the last month. Since I posted this message yesterday I did another factory reset. I also checked the documents for section formatting (see other replies) and found some wonky section settings. I cleared those up and I recreated my style sheets now documents that were goofy appear to be fixed! Thanks to EarnestAl, Mikekaganski, and Ajlittoz for where to look. I don’t remember using section formatting, but evidently I did some funny things when first starting. Thanks again!! Tim.
I’m using:
Version: 24.8.4.2 (X86_64) / LibreOffice Community
Build ID: bb3cfa12c7b1bf994ecc5649a80400d06cd71002
CPU threads: 6; OS: Windows 11 X86_64 (10.0 build 22635); UI render: Skia/Vulkan; VCL: win
Locale: en-US (en_US); UI: en-US
Calc: CL threaded
Here is some more info. If I pull down the Format menu in Writer and then select Page Style I get a dialog box with nine tabs. Selecting the “Columns” tab I almost always get one column as the current setting even though I may actually have three or four. But from the Format menu if I select “Columns …” I get a similar dialog box but with the correct number of columns set every time.
This dialogue box which allows you select either “Current Section”, or “Page Style: Default Page Style” (or whatever page style you are in)?
Your page has a single column but at some time you inserted a Section and set the number of columns to 3 so you could keep the single column for the page but have three columns for something that would be better in three columns.
.
If you want to remove the section, right click in it, select Edit Section and click the button Remove. The text will remain but the 3 column layout will be gone.
.
If you want to add another 3 column section where there isn’t already one, click in the page at that point or select the text you want to be in the section. Click Insert > Section, in the dialogue, select the Columns tab and set columns to 3.
.
If you want to get outside the section. Turn on View > Formatting marks if it isn’t already highlighted, ensure that Text Boundaries is also highlighted. Click the paragraph mark below the Section and start typing. If there isn’t a paragraph mark below the section, click right at the end of the section and press Alt+Enter to start a new paragraph below the section.

