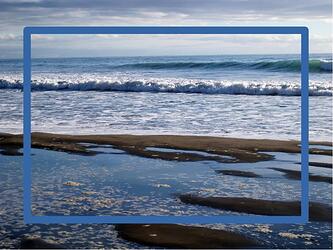
Hi. I’ve opened a jpg file in LibreOffice Draw and drew a rectangle over it. The rectangle is still recognised as a separate object. How can I make it be a part of the underlying jpg and ‘embed’ it in a way? I mean that the rectangle and the jpg become merged as one image.
- You can group them so they stay and size together, select both objects and click Shape > Group > Group
- You can merge them non-permanently by selecting both and clicking File > Export, tick Selection and save as SVG. Drag the merged file on to the page. To split apart again, select the merged object and click Shape > Break; note that an empty rectangle will split into 4 lines that will need to be merged back together. It is best split in Inkscape to avoid this.
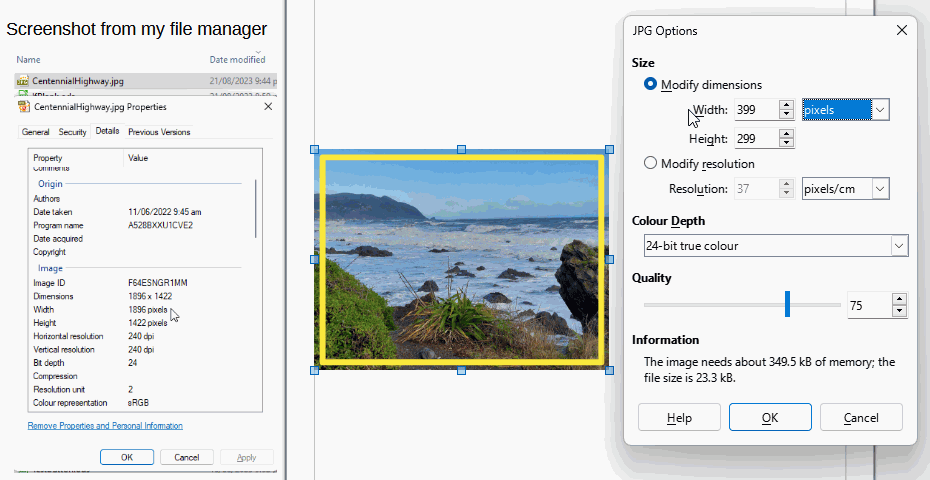
- You can merge them permanently by selecting both and clicking File > Export, tick Selection and save as JPG. To avoid loss in resolution, find the dimensions and resolution of the jpg first then after the save as jpg, a JPG Options dialogue will appear. In it, change the resolution to the original resolution and then change the width to the original width.
- You can crop the jpg to the rectangle (must be filled rectangle and drawn after the jpg is added, otherwise copy and paste the rectangle). Select both, and click Shape > Intersect
You did not write about the image’s format. The easiest way to merge the 2 objects into 1 is to select both, cut and (paste special) insert as a bitmap (raster graphics).
(The internal format then is adequate to PNG format.)
Where should I check? In the initial jpg (Files app > Properties) or after opening it, in LibreOffice Draw & where within Draw?
In the initial jpg. That is the awkward thing, in Writer you can easily check the image size and resolution in Format > Image > Properties > Crop, not so in Draw.
I nearly always use image editors, like GIMP, to edit my raster images and I normally size them before adding to Draw. If your default image editor can tell you the size, then the easiest way is to right click, select Edit with external tool and note what the image editor says.
Grouping allows you to ignore that, or at least until print time. You can paste grouped images into Writer.
my issue with jpg is that it is a lossy format, it throws data away to get high compression, so the fewer alterations of it the better.
@Grantler This will paste the two images as one but at only 96dpi and the dimensions on the page, that could be much less than original resolution.
You are right in a narrower sense. 
.
But: If I do things like that I enlarge the bitmap to original size and then start the manipulations (cut/paste).
I often have to create bitmap images with added Draw elements (mostly rectangles, arrows, some text). For that reason I enlarge the document size according to original size of the image. So I work on formats like A2, A1, sometimes A0. Then I export the selected elements, say to: png files. (No changes of resolution or size.) Or I directly insert them in Writer files, which is not the best way of proceeding.
In my opinion this is a very effective proceeding (compared to other programs like GIMP, which I regularly use as well).
.
The resulting images may be of only little resolution but large size. When I insert them into Writer I have to downsize them which automatically causes a better print quality.
.
I did not mention this before because the questioner could be disturbed by too many steps which are very fast and effective in reality… - Cheers and thanks for your sensible reply.
Although I found out the width & height of the original jpg, I couldn’t find the resolution. Neither in the Files app nor in my standard image viewer. So in this step
I only changed the width.
I cannot see any difference regarding quality between the created jpg and the initial jpg file so the result is absolutely acceptable.
If you found the original width in pixels and made the pixel width the same in the JPG Options dialogue then there is no change in image size which is great.
I think maybe you are using Mac? Maybe there is a Properties item in the External Tool that will give size. See this third party site to get dimensions from jpg file How to Find your Image Properties | Mac and PC | The Print Shop
Just an example of loss of size unless I change number of pixels in width or resolution and dimensions, compare the the number of pixels in my screenshot of file properties to Draw’s proposed export size. It would not print well.
Would it have been better, if I had not changed the width only, but the resolution (if I had found it), too?
I had a look at some images of information dialogue of File on Mac. It seems it gives the size in pixels. If you set the units to pixels and then set the same size (in pixels), then there is no loss of resolution
Does this mean that it wouldn’t have improved anything if had additionally changed the resolution?
I don’t know what type of numbers you see to get the size of your jpg, I have had to guess. It might be pixels…
Let’s say an image is 1600 pixels wide by 1200 pixels high. There is no resolution, that is the number of pixels.
If we put that image on a page then we give it a physical size. Lets imagine that we make the width 5 inches (12.7 cm) that means those 1600 pixels are divided equally among the 5 inches, so 320 pixels in each inch, or in printing terms, 320 dpi.
For physical dimensions, we need both the physical width (5 inches) and the resolution (320 dpi) to define the size. If we divide the height, 1200 pixels, by the same resolution, 320 dpi, we get a physical height of 3.75 inches (9.525 cm). The bigger the image the lower the resolution of the image because it still has the same number of pixels, they are just spread thinner.
On a inkjet printer, 300 dpi should be enough to produce a high quality image. For some printers, 240 dpi might actually be the highest resolution the printer can use. 150 dpi should produce a fair image. At 96 dpi most people will see some evidence of the loss of resolution. By 72 dpi it is obvious the picture is low quality.
My computer screen has a resolution of 1920 x 1080 pixels, that means I won’t see any loss of quality in the image while I can still see the entire image.
My screen is roughly 33 cm wide, 13 inches, if I printed at 33 cm wide then the quality of the printout would be reduced to 123 dpi.
There has been a misunderstanding on my side.
Did I understand this correctly:
width in pixels / width in inches = resolution in dpi (dots per inch)?
I found out the width in pixels of the original jpg and changed the width in pixels to this value in the JPG dialogue. So I would have had to change the resolution in dpi and/or the width in inches also, is that right?
No. Either the size in pixels, or inches and resolution. Using the same formula but rearranged
Pixels = inches × resolution in dpi
Do one or the other
Just for clarification (correct me if I’m wrong, please.):
I’ve got 2 Options:
Option 1: Change the width in pixels
OR
Option 2: Change the width in inches AND the resolution in dpi
Do I need to change the height at Option 1 and Option 2, too?
Have you tried, to see what happens? Might be quicker than waiting for a response.
Yes
In this particular dialogue box, the ratio is always locked so changing the width also changes the height.
This is not the case in other LibreOffice dialogue boxes for sizing images where you might have to set both height and width.


