How to copy part of a table including borders

Have created a family tree in Writer and now want to copy part into a larger table but I lose borders. OR move part of the tree (with borders).

I am using Windows 10 and use the borders as connectors. I wanted writer to create s document. I did not think of “Draw” which I have never used. Will give that a try. Which raises the question of how to export to draw🙄

As you can see from the number of attempts I had difficulty reproducing the problem!
Now that it is 999.9 point when I change the point size (top left) it goes back to 999.9. It appears that selecting something else causes it to shrink but not to 6 pt! It can then be changed to 6 pt. I used default, blue and red fill styles modified. I’ve put a green circle under it. The size has changed in the copy. Try re-styling and double clicking.
sample problem.odg

Please edit your question to provide more details (as usual, mention your OS and LO version).

How did you create your family tree, as a table as is implicit through the question title?

I personally use Draw for that because you can build connected trees: a set of rectangles (containing text) linked with connectors. You can then tune the rectangles layout and the connectors remain connected whatever the change in position of the rectangles. When I’m satisfied, I copy the tree and paste it in Writer where it is considered as an image (not technically true but easier to understand).

Thank you for your suggestion.

Don’t export to Draw. If your tree is not too large (and it isn’t because you used a table to sketch it, therefore less than a page worth), rebuild it by hand. You’ll have more freedom.

It it is really large (some of mine may display up to 200 persons, but not in Writer), use a generator program. My genealogy app (Gramps) outputs GraphViz code which can then generate SVG, PDF, JPEG, … And I postprocess it to create an interactive clickable HTML tree.

Unfortunately it is VERY LARGE. I used a custom page size of 180cm X 29.7 cm and used 6 point Times New Roman. I created a table of 4 rows for each generation. The first, for the labels, I made 360 columns. The second, for the names, I made 180 columns. The third was like the second but offset by the width of the first. The fourth was the same as the first, for connectors. I then copied the table to create one for each generation, then merged them into one table. I catered for multiple marriages by splitting a cell horizontally for the husband in the top and splitting the bottom vertically by the number of marriages. Connectors follow the borders, splitting cells as required. I started with Open Office but hit a bug, so switched to Libre Office which does not have it. I have nearly finished but would like to space some of them better, but although I can move the names and labels I have to repeat the connectors (the “boxes” for the labels) and then delete the originals.

I don’t really want to waste literally days of work.

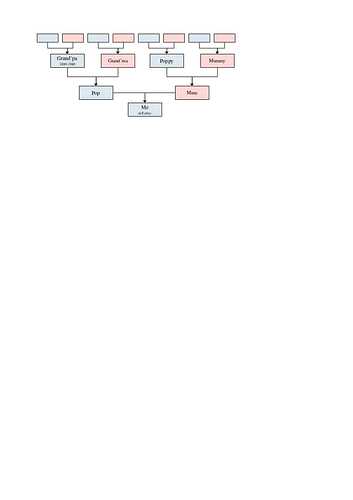
I think you definitely went on the wrong path. The ancestor tree below took me less than 10 minutes:

I used Draw styles to speed up the process and its consistency. You may have as many lines as you want in any text box, independent from others.

I don’t think you’d waste your time by using Draw. You’ll gain in versatility and ease of modification. I used straight connectors but there are also curved ones. You can format them dotted to indicate out-of-marriage relations, adoption or illegitimate children.

Instead of linking directly descendants, you can have connect partners to a “marriage/relation” (in a circle or oval) thus giving you the ability to show a date and there from connect the children.

Thak you. I will give it a go. I have about 120 names on the bottom row. I hope A0 will be big enough. I haven’t spotted a user page size.

I once had access to an A0 plotter and draw there a “modest” ancestor tree with hundreds (< 1k) persons. It is unusable. I’ve come to the habit of drawing “small” trees (up to ~200 persons) with “cross-nodes”, i.e. a circle with a sheet-reference to tell the corresponding sub-tree (or high-tree) is draw on another sheet.

This is much clearer. I have then a set of A4-sheets, understandable at first look, even if there are contorted relationships (due to common ancestors). Eventually you can have an “index sheet” where you show how the sheets are interconnected.

Thank you very much! I have set up a ‘grid’ or collection of boxes in A3 landscape with the intention of deleting those I don’t need (so everything is aligned). My boxes are 2 cm wide and 1 cm tall. I used Times New Roman 6pt. Typing in the first box was OK. The second was too big for the box (word wrap) so I selected fit to object. The text narrowed to fit. Clicking in the box the text immediately went wide (but still fitted). For the third box the font changed to 999.9 pt! If I change it in ‘Properties Character’ it immediately goes back to 999.9 pt! Have I found a bug or am I doing something stupid? I’m using the latest version on Windows 10.

“I’m using the latest version on …” doesn’t mean anything because the version may change without notice and you may have missed upgrades. It is much better to quote the one you’re using.

Draw has strange behaviour (compared to Writer). It considers every object to be different and independent from each other. You probably have a default font size of 999.9pt, which explains why it reverts to 999.9. My advice is: define a style for your boxes (border attributes, background colour, text attibutes, …). Thus a mere double-click on the box gets everything right and all your boxes are consistent.

CAUTION! Draw styles do not address exactly the same the same purpose as Writer. You might find difficult to get what you want in the beginning. But everything becomes easy once you have your styles.

For this kind of application, I have one style for male boxes, one for female boxes and one for connectors. If you add marriages, design also a specific style for marriages.

I’m using Version 7.0.6.2 (X64) 144abb84a525d8e30c9dbbefa69cbbf2d8d4ae3b

I think I know what the problem is.

I have switched to A4. I have 13 boxes across and 11 rows. I’ve modified the styles (2 of them). Each specifies Times New Roman Regular 6pt BUT I specified “Word Wrap” AND Fit to frame. The first 7 boxes worked fine. The text was large and shrank to fit on exit. The 8th changed from 6pt to 999.9 pt as soon as I got the cursor! So I dropped the Fit to frame. Now all fit nicely. I mention this in case some one else new to Draw does the same. It seemed sensible to want to ‘fit the frame’! Anyway thanks again for all your help. My problem is much easier now and, although not a direct answer to my original question I would say “problem solved” :slight_smile:

I was wrong. It keeps happening occasionally and randomly. Double clicking again, or selectin another box then the problematic one eventually corrects it. Most frustrating!

Analysis of the sample file:

  • your styles are not customised enough so that you feel necessary to add direct formatting

    E.g., Text for Filled Blue is left default with anchor at top; click on the center radio button instead; similarly, in Alignment, click on Center. You can also create a border in Line tab.

  • you are not consistent in your style usage: many problematic boxes are Default Drawing Style instead of your custom styles. Styling them Filled Blue solves the issue.

I don’t think it is a good idea to make such a skeleton sheet with >100 boxes. You’ll delete many of them on a real case. It is as fast to create the boxes when needed. Use the template for a few boxes and mainly for styles. Remember that connectors may also be styled (useful to define a consistent arrow look).

Thank you. That was an early try. I had modified the default (which I do not use except to see what I have done. I only use blue and red. I preformatted with all the boxes so that I could work out how to get vertical connectors where possible. I find it easier and quicker to deleted those I do not use than align new boxes with others. for example, my bottom row 10th box connects up to 6th box on the row above. I find it easier to work out positions of the earlier people on the row. My tree is not like yours. I have 2 rows per generation to save horizontal space. I now, apart from the “bug”?, have what I want. Does your suggestion produce something different or are they just multiple ways to achieve the same result? There are perhaps too many options. I chose the first ones that sounded like they did what I want. I am not sure, as a beginner, how to find something that does more than one thing. I really appreciate your feedback as there is an awful lot to learn!

Also, my tree starts at the tip with the earliest and lists generations forward from then. Some I see start with one person NOW and work back for just the antecedents of that individual. Just in case we may be at cross purposes. For the purpose of alignment I am working backwards from now.