Libre Office Calc printing rows and columns in actual size

Hi there - first post, so be gentle…
I’m using Calc for the first time in a craft that requires me to import a picture and then use the rows and columns to divide the picture into strips. For this to work, the row that I place the picture into needs to be exactly the measurement that it says it is once it prints. But that’s not happening in my case.

For example, if I set the row height to 9", when it prints, it’s just over 8". It seemed to be consistently off by .375" so I added that to the height of the row, but when I printed, it was over 9". Is there a setting that I’m missing that someone can help me with please? (and thank you)

Please upload your ODF type sample file here.

I suppose that the Calc is not the best application to handle the pictures…

Thanks for responding so quickly. I’ll attach a sample of what I’m talking about.
It’s actually a pretty solid way to get pictures into uniform strips to apply to the edges of books. It’s a growing craft and most people are doing it with Excel or Libre Office Calc. Also, because you can merge cells, and fill cells in with a white fill, I can have only the visible parts of the picture printed, so it saves me a lot of $ on ink.

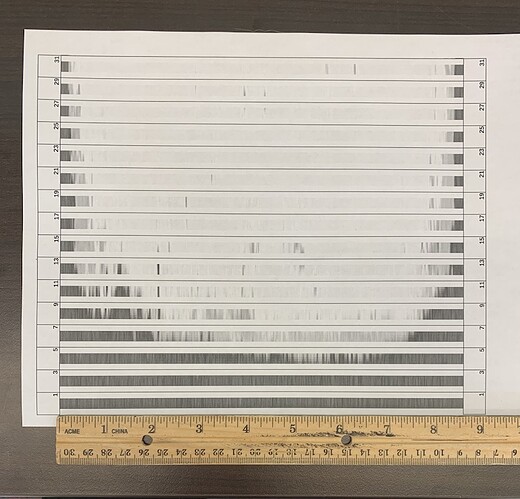
In the attached example, Row 2 (in which the picture is placed) shows on my computer as 9" and that’s the length I need it to be. When I print it out Row 2 is 8 5/8" or .375" shorter than I need it to be.
Don’t be thrown by how crazy the file may look when you open it up - the idea is that you take a picture and divide it into as many .5" strips as there are pages in a book, and then you fold each strip over the edge of the page and it forms a picture. It’s kind of hard to explain, but if you’re really curious, you can check out this video:

Alice - We’re all Mad ink saver.ods (518.7 KB)

Could it be that the shorter display in your print is related to having a white end at the bottom of the strip? In any case, the color of your strip does not fill the line height.

78654 HB printing strips

For me, the values are set to “cm”.
So the line height has 22.86 cm, I divide this by 2.54 and get 9 as result; so far OK.

Good catch on the image not going all the way down. I fixed that, but the problem is still the actual measured height of Row 2 on the printed page which I measure from the edges of Row 1 and 3 as seen in this picture. On my computer, (just like yours in cm.) it shows Row 2 as being 9" in height. Once I print it, the height (or distance between Rows 1 & 3 is 8 5/8"

I thought it could be something in my printer settings, but this happens on any printer I’ve tried it on, and I’m printing in actual size.

Thanks again for your response.

I do have a work around - since the row is 5/8" or 0.375" short, I just add that to the row height before printing, but I’d love to know why it’s doing this in the first place.

The printed width, is 1/2" by column?
By what I can measure by a print to PDF result of your sample, and the picture you shared, there is a shrink in your printing process.
See that Letter paper width is 8 1/2", and the printed sample shows a right margin of 1/2", and a 1/4" margin to the left. If each column width is 1/2", and there are 16 columns…

You must check the printer options.

1 Like