As a general rule, avoid as much as possible inserting graphical objects into your document because it is extremely difficult to synchronise them with text nd make them cooperate. They are “alien” objects which don’t move with text.
Most of your questions have a solution with styles. If you are not familiar with the concept, read the Writer Guide for an introduction.
-
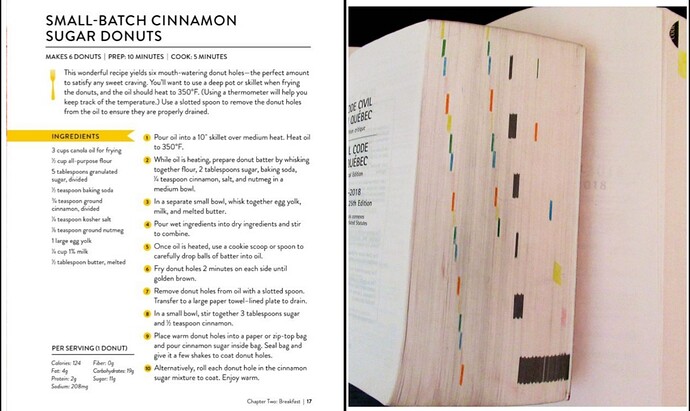
solid line underneath the title
Paragraph styles can define a border, here a bottom edge, and a distance from text. So create a dedicated paragraph style for the name of the recipe and apply it. This guarantees that all names on all pages are rigorously formatted the same. Note that the all-uppercase property can be set in the style so that you need not press Shift or Caps Lock while typing.
-
measuring tool at the top of the screen
The ruler with various sliders at top of document pane? Refrain from using it as it encourages direct formatting which is responsible for formatting inconsistencies and prevents you from centrally controlling your formatting. Instead, prefer styling.
-
add a banner
This is simply a paragraph background coupled with a smart use of left indent. Define a dedicated paragraph style where you offset left indent to reach the left edge and simultaneously the first line indent to align text with the title or “prescriptions” (serving, prep time, …)
-
servings, prep time, and cook time
I wouldn’t go for a table because Writer table cells don’t adjust to contents. Instead, type the “prescriptions” all along, separating them with space-vertical bar-space. Vertical bar is U+007C VERTICAL LINE. You can also use U+2502 BOX DRAWINGS LIGHT VERTICAL │ or U+2503 BOX DRAWINGS HEAVY VERTICAL ┃. You can define a character style to set a different colour (lighter gray than text) for this separator. The space itself can be wider or narrower: there are many spaces in the Unicode block starting at U+2000.
Note: if these symbols are not readily available on your keyboard (U+007C is usually Alt+6 on PC-like keyboards), you can type their Unicode encoding like U+2502 followed by Alt+X.
-
add like a coloured section
Not understanding exactly what you want. Anyway, don’t add graphical shapes for the reason mentioned above. Play with paragraph background. You can add this background colour in the title paragraph style. But, if your book is a collection of various recipes with different colours (one for starters, one for vegetables, one for meat, one for desserts, …), you need one paragraph style per colour. However, Writer has a feature called hierarchical inheritance. You define one generic paragraph style without colour (or with the most used colour) and you “derive” from it child styles where only the colour changes. When you modify the parent style, e.g. font face or size, this modification is forwarded to child styles and your book is magically updated in a single operation.
-
‘Bleeder tabs’
Technically, it can be done through a combination of a page style plus a (text) frame attached to the header and offset to the adequate position. The frame has a background colour defined in a frame style along with size, position and wrap mode, and contains an empty paragraph. It will display as intended on screen but for the reason mentioned by @EarnestAl, it will not print correctly (clipping will occur on the printer ‘technical’ margins).
In addition, manipulating frame styles reliably is advanced use.
EDIT: of course, you need one page style per tab position. I think it acceptable that the change in position of the “tab frame” be done with direct-formatting as this is a one-of-a-kind “exceptional” change.
Additional remark:
The layout of the recipe probably needs a 2-column table where the left one contains the ingredients and the “per serving” information (with the added difficulty of flushing down this data) and the right one contains the procedure. An alternate approach is to indent the procedure (and format it as a numbered list in both approaches) while the ingredients and per serving are two frames which can be “easily” positioned independently from each other. But, once again, manipulating frames and frame styles requires some skill and experience with Writer.

