When I print a spreadsheet, grid lines are dark black. How can I print gridlines in light gray like other spreadsheet programs?
Try to switch OFF the grid printing option, and use a colorized (light gray) border lines around the cells that you want to print.
Use Cell Styles.
Menu Format - Page Style - Sheet tab.
Thank you, but you misunderstood my issue. I would like to print the grid lines but with a lighter colored line (such as gray) rather than the dark black grid lines. My other spreadsheet programs (Microsoft Excel, SoftMaker Calc, etc.) automatically print the gridlines in a light gray thereby minimizing the appearance of the grid.
Thanks for any suggestions.
Craig Townsend
C
[e-mail redacted for security reasons]
No.
Menu Format - Cells - Borders tab.
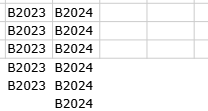
Sorry, but that is not a solution for a large spreadsheet. Too much time and effort. It seems this issue is something I must accept as the way Libre Calc performs or use a different spreadsheet program.
Thanks for your response.
- Ctrl+Home
- Ctrl+Shift+End
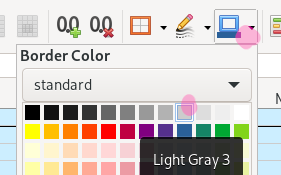
Grid v.s. Border lines:
I suppose that it is enough to modify the Default Cell style in yout huge document. Set the color of the border lines to light grey. Switch OFF the Grid printing, and DONE!
.
It is NOT too much time.
My guess is that both @ctownsend and @Zizi64 are correct
@ctownsend is correct that, in some cases, it is not realistic to just add a border to all cells. Even if this requires just a few quick and easy clicks.
@Zizi64 is correct that, in some cases, it is quick and easy to just add a border to all cells.
I’m assuming that we’re facing the same challenge as @ctownsend here. We have a very large number of spreadsheets. In the millions. Terrabyte (Tb) in total. Yes we could simply create a scrip that would:
- Navigate to Format menu —> Page style option —> Sheet tab —> Print group. Then, deactivate Grid.
- Add a customized color border to all cells. For example, light grey.
But, in our case, the above is not realistic. Why? Because we need to keep the already existing customized border color as is. Otherwise, our workflows would brake and the final PDF are either not readable or too hard to read. So the step 2 above does not meet our needs.
Why do we need to keep the already existing customized border color as is? Because each spreadsheet and their sheets contain a large number of customized border colors. For example, but not limited to:
- Columns Z to EQ need a white 2.25 pt border.
- Columns ER to LF need a light gray 0.75 pt border.
- Rows 1 to 20, need a light purple 0.25 pt border.
- Rows 21 to 40,000, need a dark purple 0.25 pt border.
- And there are many cells with customized color border. In other words, the same row or column need to include cells with customized and different color border.
Obviously, in the case of millions of spreadsheet totally terrabyte (Tb) of data. It is not realistic to manually open and all a light grey border around the already existing customized borders.
What would meet our need is this suggested new feature or an equivalent:
- Using Format menu —> Format Cell option —> Border tab. Set any customized color borders to your liking. To any rows, columns or cells. Let’s call those front color border.
- Navigate to Format menu —> Page style option —> Sheet tab —> Print group. Then, both activate Grid and, set a customized color for a background grid. For example, a light grey. Assuming that the already existing front customized border colors above would always override and cancel the background border colors.
- The final PDF result would include both the front and background color borders. Joy

If @Zizi64, about modifying the ‘Default style’ is not enough, you can use conditional formatting, where the conditions can take into account the row and/or column, using formulas for that.
With that, as it depends on the styles, it is easy to modify the style to get a change.
https://help.libreoffice.org/latest/en-US/text/scalc/01/05120000.html?DbPAR=CALC#bm_id3153189
Thanks, but too complicated. I’ll just use another spreadsheet program (Excel or Planmaker).
[edit] spam removed @karolus [/edit]
Thanks for your suggestion @mariosv  We tried this today. Unfortunately this is not a realistic resolution in our case.
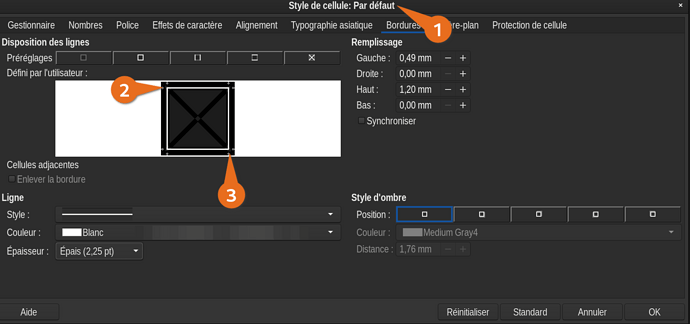
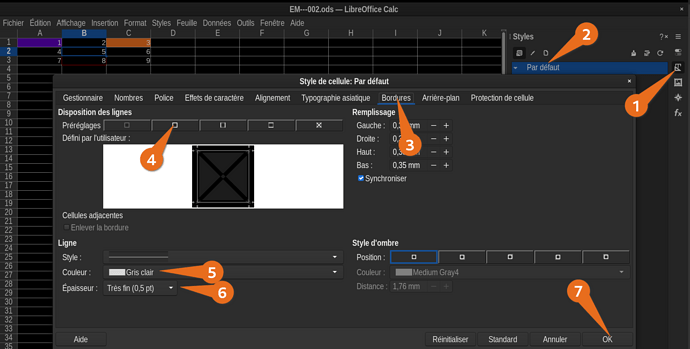
The challenge with Default style (Par défault) is that, somehow, with LibreOffice version 24, the Default style is not able to quickly and easily add border on all the inner lines of a sheet. It is only able to add outer lines. The numbers 2 and 3 in this screenshot below shows this challenge with Default style. Notice that only outer lines can be added. So the end result is a frame. Not the needed grid.
Notice in this screenshot above, under “Préréglages” group, into the small 5 buttons, the inner lines options are not offered. And yes, before opening Default style we did select all cells in the sheet using Ctrl+A. Same result with any other Style. Inner line option is not display in LO 24.
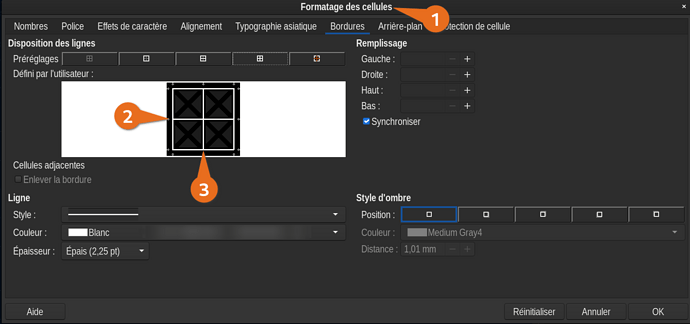
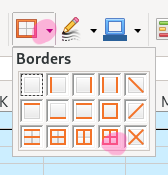
In comparison, with Format cells (Formattage des cellules), when adding a border to all cells, with just a few clicks, borders can quickly and easily be added to all the inner lines. The numbers 2 and 3 in this screenshot below shows those needed inner lines. If someone does not need to keep its already existing customized cell borders, Format cells does make it quick and easy to create a grid with any customized colors.
Per my previous comment above, in our case, with a large number of large spreadsheets, using Format cells is not realistic to to create a grid. It does not meet our needs. Because we loose all our already existing needed customized borders on various lines, rows, and cells.
Version: 24.2.3.2 (X86_64) / LibreOffice Community
Build ID: 433d9c2ded56988e8a90e6b2e771ee4e6a5ab2ba
CPU threads: 16; OS: Windows 10.0 Build 22631; UI render: Skia/Raster; VCL: win Locale: es-ES (es_ES); UI: en-US Calc: CL threaded
Thanks again @mariosv for your other suggestion. We are familiar with conditional formatting. This is very useful. But in our case this is not realistic. Because it is either too slow or not usable with a large number of large spreadsheets. If someone else as small spreadsheet with small amount of lines and rows. This resolution will likely works for them.
The challenge with conditional formatting is that after it is applied to a large spreadsheet, for example, 57 000 lines and 760 columns. When someone tries to either just view the spreadsheet or do operations on it, it is either very slow or not usable. Using a 8 cores CPU and 32 GB of ram. With LO multithreads activated.
My guess is that, when the user view the very large spreadsheet, somehow Calc, process all the conditional formatting during viewing. Which uses a lot of resources. For example, this happens when scrolling up or down a sheet, or doing operations. For example, opening a cell menu to choose an option. In other words, somehow, for each scrolling or each operation, the conditional formatting seems to be done on all 57 000 lines and 760 columns into the sheet. Not just the few lines visible on the screen. Even if there was no change to the condition formatting.
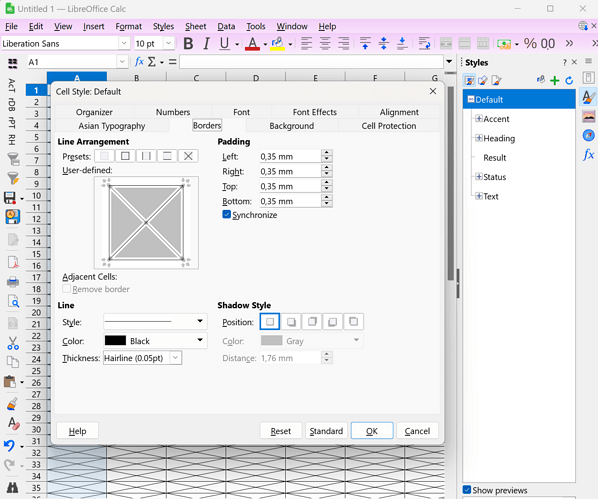
Hello @mariosv  About your screenshot in your comment above, are you suggesting adding diagonal lines to the Default Style? If yes, this does not meet our need. Diagonal lines result in a X in cell.
Reminder that our needed end result is a customized color grid on the exported PDF file
If you meant to ask for our LO version, we use the same as you, 24.2.3.2. Ours is from https://flathub.org/apps/org.libreoffice.LibreOffice
I think it is only an example for usage the Cell Styles. Of course you can select the horizontal and vertical lines only.
Version: 24.2.3.2 (X86_64) / LibreOffice Community
Build ID: 433d9c2ded56988e8a90e6b2e771ee4e6a5ab2ba
CPU threads: 4; OS: Windows 10.0 Build 19045; UI render: Skia/Vulkan; VCL: win
Locale: es-ES (es_ES); UI: fr-FR
Calc: CL threaded
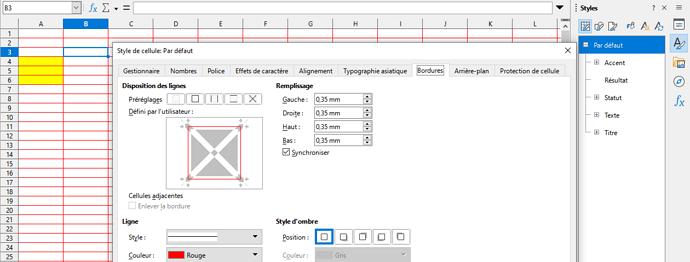
Not it was about that more than around can be achieved, for cell style.
Hello @mariosv @Zizi64  The Defaut Style option worked. Joy. Thanks for all your answers.
It worked with a new spreadsheet. It was not working with our already existing spreadsheet. Because other already exiting Cell Formats were interfering with the Defaut Style. My bad. User error.
For those interested to try this Defaut Style option to print a PDF with any custom color grid to your liking, find the steps below.
Steps:
-
Navigate to Styles menu —> Edit Styles option. Alternatively, using the Styles panel, click on the Styles button. Or press F11.
-
Using the Styles panel, right click on Default Style. The numbers 1 and 2 in this screenshot below shows this.
Note: In this screenshot above, this Calc use a dark theme for the interface. Ignore this. The end result will be a PDF with pale grey line on white background. Not black.
-
Click on “Border” (Bordures) horizontal tab. The number 3 in the screenshot above shows this.
-
Under “Preset” (Préréglages) group, click on The Four Borders button.
- Note: This button automatically includes both inner and outer lines for all cell
-
Under “Line” (Ligne) group, configure an appropriate line. The number 5 and 6 in the screenshot above shows this.
- Note: If you already have customized Format Cell in your spreadsheet, double check that your Defaut Style border is thinner than all your other customized Format Cell. Otherwise, the Defaut Style risk to interfere with your other Format Cell.
-
Click on OK button. The number 7 in the screenshot above shows this.
-
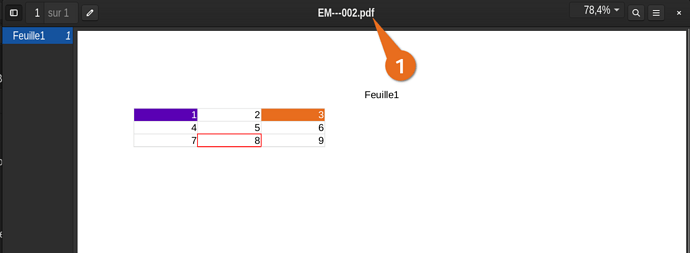
This screenshot below shows the final PDF result. With a pale grid line added to all cells using the Default Style. The cells 1, 3, 8 are using Format Cell.
-
Enjoy


