I have been trying to use the Crop Mark extension
(see Crop mark » Extensions)
I have been following these (slightly annotated) instructions.
Usage in LibreOffice 4.0 (Actually 7.1.2.2)
- Download and open cropmark.odt and set the requested page size (plus bleed area required)
2a. Click on View » Toolbars » Logo to add Logo tools to standard toolbar
2b. Click on the Start icon (circle with a play button icon inside) of the Logo toolbar section
- Insert the result (a single shape group) into the master page of your drawing, presentation, or into the header or the footer of your text document.
I go wrong on step 3.
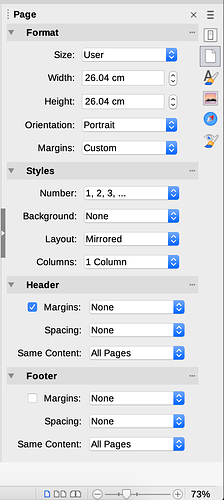
I go to the Side bar Deck » Page » Header of my text document
and click on the tick box and make sure that Same Content is set to All Pages
I then select and copy the shape group from cropmark.odt and paste it into my Header area of page 1 of my text document.
The crop marks appear in Page 1.
If I then create a second page by Insert Page Break, there are no crop marks on the second page.
Not sure what I am doing wrong

