Problems manipulating images in Writer

Libreoffice was a perfect solution until recently, a very satified nd highly experienced user since at least a decennium ,
Currently Using LO 7.1.4.2 ( updated from initially 7.0.2) + Ubuntu 20.04

when manipulating images in writer in my text LibreOffice seems to be doing its own thing It doesn’t do what i ask it to do, at least it doesn’t respond as it used to
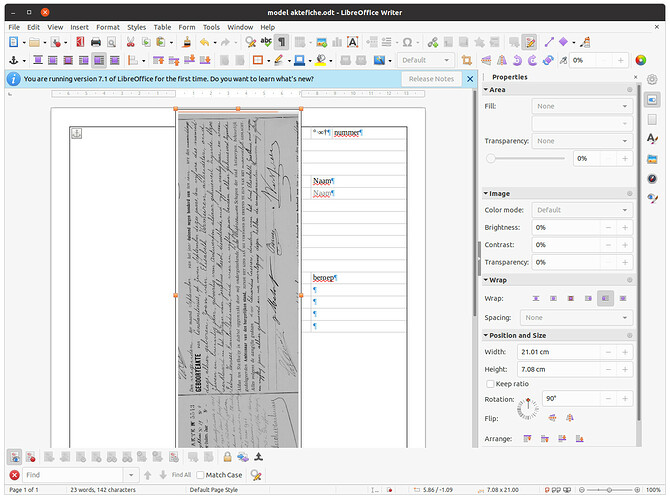
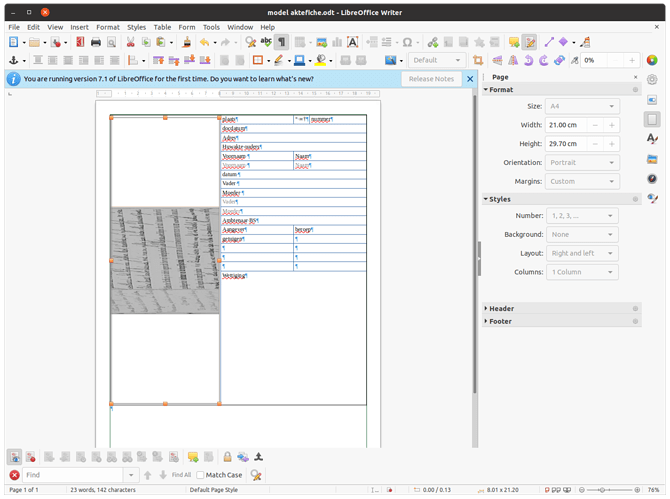
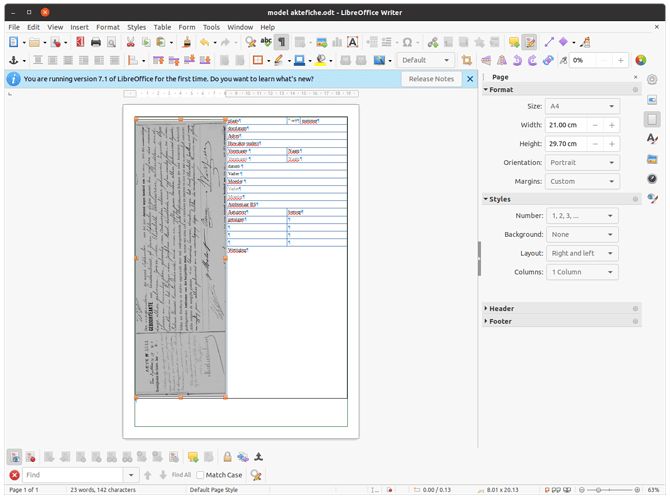
images change their sizes automatically , are positioned automatically are put inside their own margins not the page margins i defined, they sit over collumns, they don’t fit in tables …
anchor wrapping and alignment settings are ignored
i cannot put it on a fixed space and wrap text around it margins have changed
i cannot fit in tables images don’t sit is cells but on top
when stretching with images the length changes but not in proportion even when ratio should not be maintained, idem for stretching length

Additional info
I was trying to make a page that I would use as a template but therefore the sizing and positioning of the image is crucial
there a 2 documents “MA” and “BDC”
BDC has and image that is 21cm wide and 6-8 cm long but its rotated 90degrees and it becomes 21 cm long AND 6-8 cm wide , wrapped to the left a text collumn wouls remain of 8cm to put in text
or the image could sit in a table with the 8m text col subdivided in text areas
the MA has a image that is 21 cm wide and 12-15 cm high

additional info
create document , created table with text in the right collumn
when inserting the image follwing occurs

when trying to move the image in to the left cell of the table it floats on top

The fact that I want it aligned left and top in the tablecell is ignored , even the poistioning is altered back
that i want it wrapped left doesn’t seem to help
BTW selecting the frame to create a framestyle doesn’t seem possible properties always shows the image properties not the frame

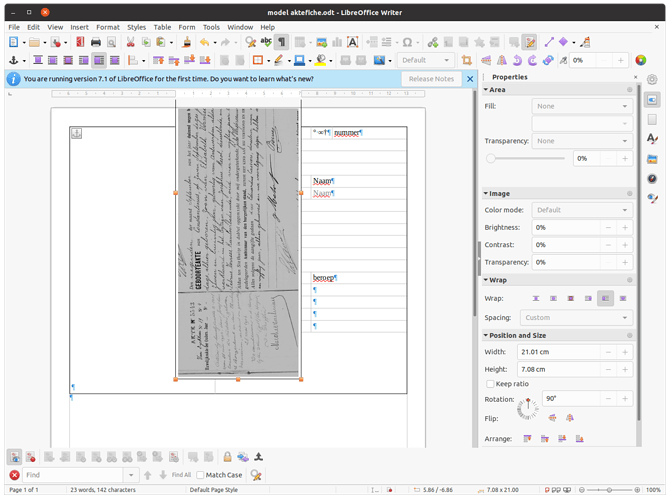
when trying to achor it as a character and changing the size IN to reflect the 21 cm length & 8.5 cm with waht seems to be the frame actually sits in the right position but the image is distorted and covers 1/3rd of the surface,

1 Like

Click edit below your question and use the paper clip to upload a sample file (remove all sensible data before).

Are you working with rotated images?

Please, change the question’s title to a more descriptive one; may be: “Problems manipulating images in Writer”. Thanks.


Add Answer is reserved for solutions. Please, click edit below your question to add more information.

  • In which file format do you save?

Ebot , thanks for answering
i wasn’t yet saving, i edited a new document - so the fileformat is of no consequence in this matter
derek

Try to rotate the image before you paste/import it to Writer.

The same thing happens to me, 2023 here. The quick solution was to use my hated ms word. I don’t have time to learn about frames over frames, captions, etc…

In this case, you can outsource your work.

1 Like

Can you explain what value this comment is expected to have for anybody?

1 Like

In case the developers see it, that problem also happened to me, but using Ubuntu 23. When on another desktop, for example in Lubuntu, this does not happen, I don’t know if it has to do with the graphics system or something like that. Also in the latest version of writer on Windows I have not seen it happen.

To master image position, you must understand images are hosted in a frame. A frame is a rectangular area which is removed from the available “flowing” space in a table. This means an image, though anchored to some paragraph may in fact be laid out anywhere in the page. In other words, the image is not constrained to the paragraph bounding box or table cell.

If you can define a “standard” (for you) position for all your images (they are positioned the same relative to their anchor), the simplest method is to create a custom frame style and apply it to all your images. This is very quick and user-friendly: a double-click on the frame style name when the image is selected and the image inherits all style properties, including relative position.

This is exactly similar to what you do when you style a paragraph.

If you have no “standard” layout, you must adjust manually each image in its turn. Right-click on an image and Properties. This will open a frame dialog. The most important tabs are Type and Wrap.

BEWARE! If you added a caption to an image, you now have two frames: an outer frame for the caption paragraph and an inner frame. The inner frame contains the image. To control position, you must play with the outer frame. The inner frame is entirely nested in the outer frame, so its positioning is rather limited. Take care to deal with the outer frame.

Selecting the correct frame is not obvious. To ease this task, enable View>Text Boundaries so that a light gray rectangle (which doesn’t print) is draw on screen around the frames.

To show the community your question has been answered, click the ✓ next to the correct answer, and “upvote” by clicking on the ^ arrow of any helpful answers. These are the mechanisms for communicating the quality of the Q&A on this site. Thanks!

*For additional information, either edit your question or comment the answer.

Wasn’t that frame also there in 6.4? I kind of noticed that feature because it was different from earlier versions

i will try to make aframe style for my template

Thanks for your inspirational answer @ajlittoz

The solution I found is this but it creates a lot of work and it means Libreoffice writer doesn’t handle images in text well, and unlike it did before

I’ve created a file with an image and anchored the frame as a character in a large table cell

i’ve set the size of the frame to the size I wanted 25cm long 8.75 cm wide

i’ve edited the image with GIMP ( or any other image editor) and rotated is 90 deg counterclockwise the saved the file ( for 3500 images to make these documents that creates a lot of supplemental work )

the I’ve replaced the image and now it fits like a glove

This is unfortunately the workaround to use presently because of bug tdf#125594 (issue with image rotation).

However, anchoring As character is not the best solution unless you really need an auto-sized table cell. You could have simpler results by anchoring the image to the same paragraph as the cell and positioning the image aside the table (not in a table cell). With adequate position and wrap parameters, you’d get what you’re looking for with very little effort (and these parameters could be stored in a frame style).

Considering the kind of data shown in the screen shot, I wonder if Writer is really the tool you need. Have you ever looked at the GRAMPS project. It is meant to manage this sort of data and can produce, as a by-product, many reports (including Writer reports) and charts.

Thanks for the suggestion of Gramps looks interesting but it would be my 5th Genealogcal platform after Family search, Wikitree and Geneanet (the online tree platforms) and Aldfaer (off line). I might consider changing the latter for Gramps as there is an Linux version of Gramps .
However that was not the objective of this exercise is to have a printout of a birth/death/marriage document that is often hand written and a table with the essential information typed
The document has to go in a personal archive of hardcopies, the typed up info is the relevant information that is needed for entry in the online platforms and genealogical programs like Gramps. Most of the original documents are largely filled with handwritten information and much is barely legible. So after tedious examination the extracted information is put on the document, and filed in an organised archive. itś not useful to keep the pictures and scans in a directory tree without making these annotations

What you describe is exactly the workflow I follow with GRAMPS.

When you create GRAMPS report (or web site which may be local to your computer), graphical data is printed with the “essential data” kept in the DB records. Thus you get “for free” what you try to achieve in Writer. And GRAMPS can file much more information, such as references to documents from where you extracted information, annotations, comments, status information about your research, …