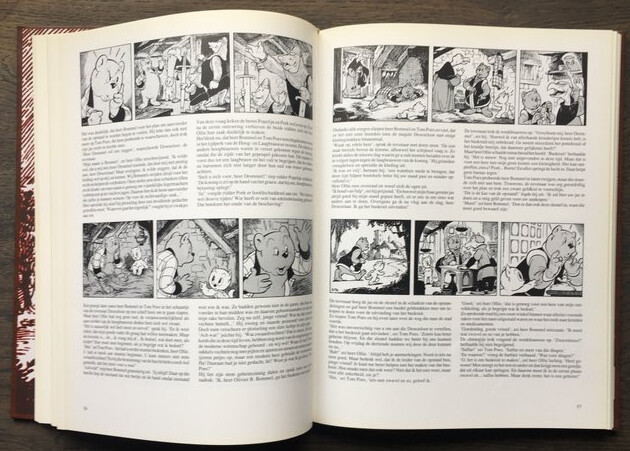
- How can I make a paragraph- or page-style for 2 columns text under 1 columns images? As in Tom Poes and Bommel.

E.g. on the same page 1 columns image, 2 colums text, 1 columns image, 2 colums text, etc - How can I change the standard space of 0,5cm between columns to e;g. 0,3 cm?
First, image and text layouts are not correlated. Therefore the simplest schema is a 2-column page style (unless you also want full-width headings). See EDIT below.
Your images will be positioned by frame style(s). You can go for a single frame style if your images are strips containing 3 images as in the screenshot). With suitable style configuration, individual images can be made to look like a strip (otherwise, create 3 styles, one for left, one for center, one for right images), but quick experiment shows automatic repositioning occurs as expected.
PS: it will be easier to give ad-hoc advice if you mention OS name, LO version and save format. Attach your present mockup if you have one for comments.
And, of course, it will be more “comfortable” for you if you’re familiar with styles, notably frame styles which are slightly unstable if you aren’t carful enough.
This works because frames are not jailed inside text column. They can “float” anywhere in the page.
Simply adjust the columns property in the page style.
EDIT:
A deeper experiment shows the 2-column page style does not meet your specification. You must insert 2-column sections between the strips. I don’t like this because it implies a lot of manual work (because sections can’t be styled; consequently, though they are all identical, they must be configured individually by hand).
Sample file:
AskLOStripIn2-col.odt (33.0 KB)
@ ajlittoz, indeed a 2 columns page style doesn’t work. Inserting page wide images gives funny results and inserting section breakpoints every time is indeed quite tiring. I experimented already with inserting 2 columns between the strips. But each time I had to re adjust the space between the columns although justification is retained. I don’t see how frame styles can help. I work with LO 7.4.4.2 (x64) on Windows 10.
The way I want to work on it is as follows:
- I have some page-width justified text (can be Text Body) in the correct font,
then - I decide where to insert page-width images (can be divided in 2, 3 small or larger… images, but with the same height). The division of the images are made in the drawing in the correct dimensions (fixed heigth and lenght).
then - To make long lines with small text (9pt) readable I split it into 2 or 3 columns. Columns must be justified.
Any easy automation is welcome, preferable with use of “some” style.
Thanks already for the quick answer.
PS: In order to save work I have not jet a mock up. First “how” then “what”.
Look carefully at my example document. I deliberately chose to insert “individual” empty frames to tune the frame style and check auto-repositioning. The key factor is to absolutely prohibit direct formatting (and this is not easy at all with frames). Then with Allow overlay unticked, Writer will shift the frame to prevent overlay. To force horizontal shift, I constrained the frame (style) to be aligned at top of paragraph text area. Frame height is fixed at 4 cm while frame width is “at least” 4 cm with AutoSize ticked so that the frame can somehow adapt to image width. Wrap mode has been set to None so that no text can be flown aside the frame. Note that this does not prevent repositioning of frames at right of existing ones (as I mentioned in my answer, frames and text are not submitted to the same constraints).
All this is valid only if you save .odt because other formats have no notion of styles and will translate to one-of-a-kind direct formatting which will drive you crazy.
- Write your text in standard 1-column document. Style it. Probably customising Body Text will be enough (font face, size, justification, …). Don’t bother for strip insertion. Just pay attention to the correct paragraph structure.
- Insert your images. If I understand it correctly, you have full-width strips, meaning there will be only a single “image” (seen from Writer) in any paragraph (which means no repositioning is necessary because there is no conflict between adjacent images). GOLDEN RULE: don’t “touch” the image in any way otherwise you’ll introduce direct formatting (DF) and you won’t easily get rid of it. DF takes precedence over styles and masks the effect of styles. Apply your frame style. In the sample file, I customised built-in Frame.
Make sure the frame style anchors To paragraph.
There may be circumstances where the strip is at bottom of a page and text on the next one. There is no way to Keep [frame] with next paragraph. You’ll have to handle this situation manually by inserting a page break at the beginning of the text (not the end of the previous paragraph in the preceding page!!!), but do this only after the 2-column layout. - To format the text below the image multi-column, select the text and
Insert>Section. This automatically moves the text inside the section.
The boring part is to set the number of columns and the space between columns repetitively because there are no section styles.
My solution with full-page illustrations and Inkscape.
- The text in LOWrite is made page-wide, so without columns.
- The drawings are made in Inkscape and saved as *.svg.
But *.svg files become blurry bitmaps if you import them directly into Libre Office via copy-paste, so - The *.svg files will be opened in LODraw. This are a vector drawing in 1 group. So first right click and break and then select the necessary drawing and copy it.
- At the beginning of the paragraph in LOWrite with an explanation of the drawing, the drawing is pasted and changed to As Character via Anchor.
- The text below, which should be in 2 columns, is now changed to 2 columns via columns > 2, but with a space of 0.5 cm in between. A line break (actually a section break I think) is automatically added after the drawing.
Indeed, if I ultimately want a space of 0.3 cm, I have to change it each time I type, and I wanted to avoid the latter because opening into LODraw, selecting, copying and pasting is not that bad because they are all mouse operations.
NAWstrip2kolommen.odt (360.0 KB)
The line break belongs to the trailing paragraph which contains the image.
- Drag the .svg file into Writer or use Insert > Image to insert svg.
- You can set Anchor as Character as default in Tools > Options > LibreOffice Writer > Formatting Aids > Image
- You can set up the section design as you want it and add it to AutoText so it can be added by typing the shortcut and then pressing F3.
To create the AutoText entry:- Create an empty paragraph before and after you have created an empty section modified to your satisfaction, including paragraph style.
- Select both empty paragraphs with section between (needed to add it to AutoText).
- Click *Tools > AutoText (Ctrl+F3).
- In the dialogue:
- Select My AutoText
- Give it a memorable name, e.g. Section 2 Columns
- Create a simple shortcut, e.g. S2
- Click the AutoText button and select New. Click Close
To enter a new section just type S2 (or s2) and press F3. Place cursor at the end of the previous image and type S2 then F3.
BTW
Don’t use Default Paragraph style for any text; it is there to be a parent to child styles. A change there will be applied to child styles except where the attribute has been modified. You should be using Body Text for your bulk paragraph text.
Because you want to use Bahnschrift font you can set Default paragraph style to Bahnschrift (right click the style select Edit style and under the Font tab set Bahnschrift), Text Body will automatically change to that font but you also want to change the spacing.
Right click Text Body, select Edit Style > Indents & Spacing. Set Below paragraph to 0.00 and Line spacing to Single. Select Alignment tab and set to Justified. OK
I also took the liberty to use Strong Emphasis character style and created Important character style so I could remove direct formatting. This means that if you later decide that you wanted a different font, then changing just Default Paragraph Style will update all the text (not Headings, they are set by the Heading style).
NAWstrip2kolommen104769EA.odt (329.2 KB)
I used to put all my drawings in one file (not to have too many files, so I can select one of the drawings by eye). Thus I need to copy one of this drawings to paste/insert it in the final file (text +drawings+images +spreadsheets+…). But insertion doesn’t work with part of a *.svg file directly from Inkscape. I see now that the translation to bitmap happens in Inkscape, not in LO.
Thanks a lot for the very to the point advises, I’m busy now to further explore the other ones.
Not quite.
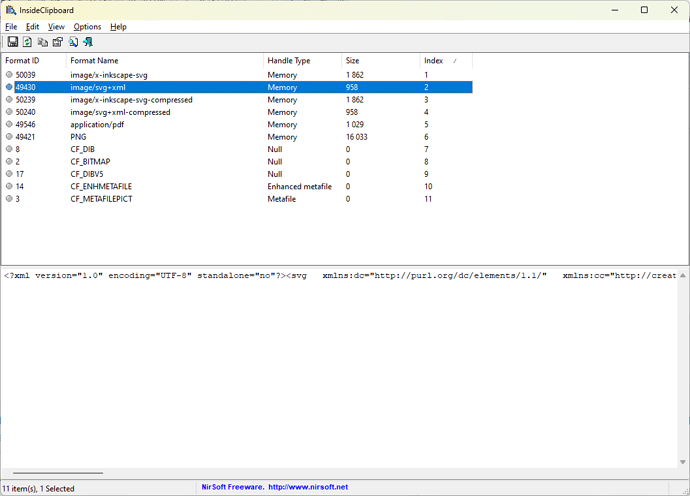
A source application provides what it copied, in a variety of formats that it can convert to. On Windows, this is what Inkscape advertizes to clipboard:
It includes both vector formats, and raster images, so that the target application can choose what it supports. Note that only the formats with names starting with CF_ are the standard Windows clipboard formats; others are custom formats.
LibreOffice doesn’t know about the custom formats created by Inkscape. Thus, it can only use the standard formats, and it defaults to a bitmap.
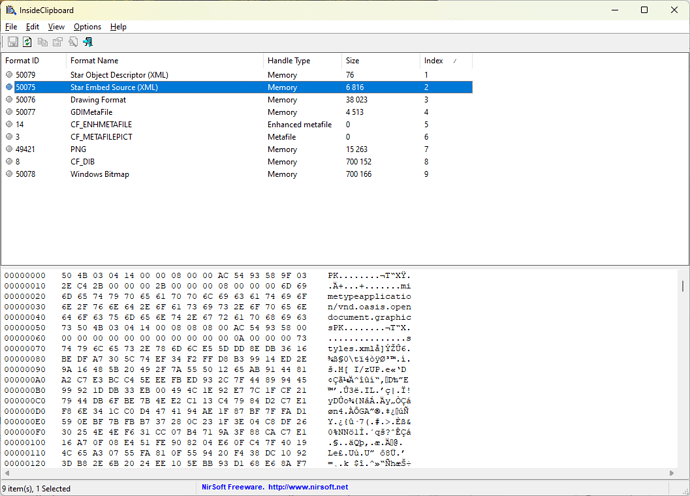
For comparison, this is the list of formats, that LibreOffice itself offers, when a vector graphic is copied to clipboard in Draw:
Supporting specific other clipboard formats isn’t a rocket science (especially when they are basically plain SVG, which is already supported by the program in other contexts). It just needs a feature request, and then it needs some developer convinced that this is worth the effort 
The Break command in Draw is quite destructive, it cuts things to the most basic shape, so a rectangle becomes 4 lines. Inkscape is more subtle and allows the user to enter groups in an svg.
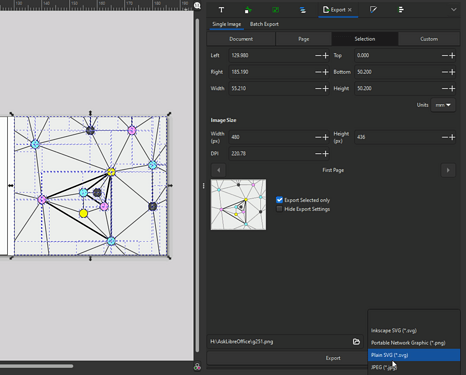
Can you not enter the relevant group and select the items you want to export in Inkscape and Export Selected only?
Indeed quite destructive (but less bytes!) but I see it as a final stage before translation to x.pdf. Exporting (full page or selection) works only with a separate file and I have to name (and remember*) each selected drawing, that’s too complex. But what mikekaganski says sounds promising, only not for now, that’s for later. For now I want to finish my “comic” instead of customise programs/windows/LO and by accident loose my work.
(*) “and remember” the name, as Inkscape doesn’t make thumbnails.


