Writer - How to put image side by side without overlapping?

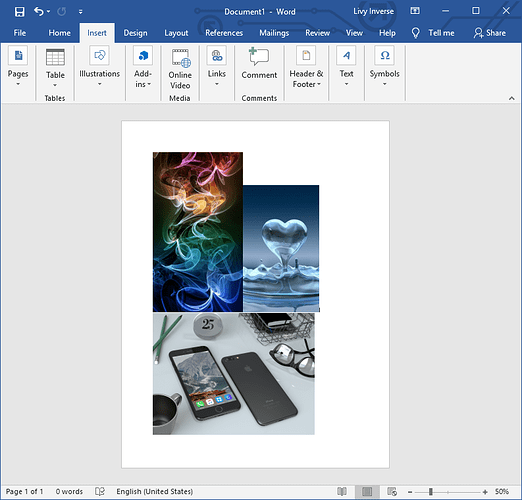
In Word, when you insert a series of images, they are arrange from left to right, from top to bottom. When there are enough space on the right, the next image will be put there. And when there is not enough space, the next image will be put under the previous one:

What I am trying to do is just arrange small images to be printed in batch to save paper. In Writer, the images are free to drag, and overlap each other after inserting. Dragging each one not to overlap each other is time consuming. How to I achieve the same Word’s behavior in Writer?

Edit: following instructions from ajlittoz and Mike Kaganski seems to work, however if I rotate the image, things are broken again.
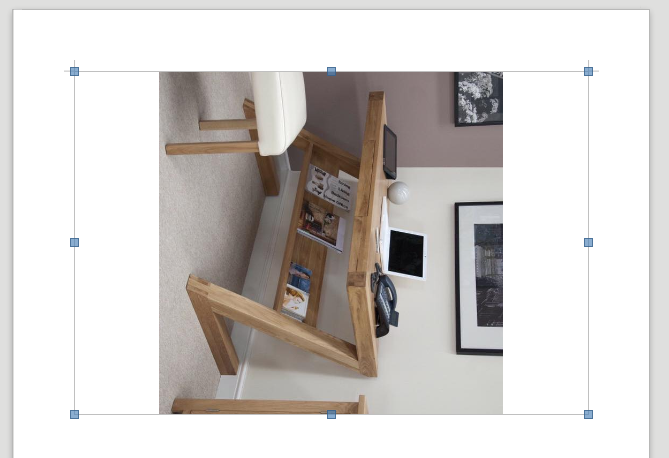
image description

From quick experiment, it looks like Writer keeps the initial size (width x height) of the image when you request right-click>Rotate or Flip>Rotate xx and scales down the image in the initial rectangle.

I don’t know if this is a bug or intended behaviour. To workaround it, either make the rotation outside Writer (in a picture processing app like GIMP) or pur your page in landscape mode and inert normally. Of course, this suggestion assume that all your pictures have the same orientation.

@ajlittoz: I’d say it’s a bug, please file it.

@ajlittoz No it does not scale down the image. It simply rotates the image around the pivot, then crop it. I am switching to LibreOffice from Microsoft. If it is not a bug, it is sad to see such a design that goes against normal user behavior. I don’t expect any user who wants to keep the original frame after rotating like that.

Bug filed as tdf#125594

Anchor each image “as character”.

Writer offers more versatile positioning options, albeit the process is initially more manual. It can be automated through the use of frame styles.

The main parameter in your case in the anchor of the picture (or frame containing it).

In your design case can be reached by modifying the default anchor selected by Writer after inserting an image. Right-click on picture and choose Anchor>As Character. Your image is then considered as a huge character and Writer applies the usual justification/alignment rules.

Note that with this anchor mode, you have no longer any freedom to move your images to other locations in the page to achieve a better look. Writer is in command. What you can do is add spaces (preferentially some quad-space which are wider than the extensible/shrinkable U+0020 SPACE which Writer enlarges or shrinks as needed) or tabs.

In case you have other not described requirements, edit your question to provide additional details (don’t use an answer for something which is not a solution).

To show the community your question has been answered, click the ✓ next to the correct answer, and “upvote” by clicking on the ^ arrow of any helpful answers. These are the mechanisms for communicating the quality of the Q&A on this site. Thanks!

PS: correct tag is writer, not common which applies to all applications in the suite

I seems to solve my problem. However, it become ridiculous if I rotate the image 90° before anchoring it as character.

In this case, put your page in landscape orientation: the rotation is transferred to the paper sheet and you insert your umages without rotation.

I think it does not serve my purpose. In fact, I do not care if the image is landscape or portrait, as long as I can arrange as many as possible to save paper, print them, then cut them from the printed sheet. Or maybe I don’t get what you mean by changing the page orientation to landscape.

Now that you tell the whole story, I think Writer is not the right tool for what you want. I had a similar need to print photos on a printer with paper rolls (not pre-cut sheets of paper). I used GIMP to set my pictures side by side within the width of the roll (nearly 1m!) and them print stripes of roughly 40cm (the maximum that could be fed into my manual guillotine trimmer).

The advantage of using GIMP is you can adjust picture definition & dimensions, crop and color-correct the images. You eventually fine control the inter-image margins if needed.

@Livy I have to agree wholeheartedly with @ajlittoz . Why would you ever use a text processing program (Write/Word) for image processing, especially when your document has no writing?! Do you use a wrench/spanner to drive nails into boards? If you don’t have GIMP or Photoshop (both are overkill for what you’d like to do), use MS Paint (or whatever its called these days). Or you could use LibreOffice Draw instead of Writer, which is far better suited to the job.

@gtomorrow Because I can easily preview my images on A4 size before printing. For some images, I need exact size (ie: 10cm * 8cm). I highly doubt if the programs you mentioned can print an image at a precise dimension, or they have such preview features.

@gtomorrow: good point, I completely forgot Draw for simple tasks. However, for photo job, if you want to avoid Moiré effects and other adverse artefacts, you better convert first your pictures to account for differences in dpi between the printer and the camera. You can also control quality loss, deblur and eventually enhance contours. In my case, I had to do all that because the final file size was in the range 500-800 MB. Needless to say, the printer does not understand .xcf or .psd. The file had to be .pdf which seriously inflated the original.

@Livy: GIMP is FOSS (freely downloadable) and is pixel-accurate. DPI is set independently. BUT (and this is a very big BUT), you’ll need some time before you can something useful with it. Even if all you want is positioning rectangles (your pictures) in the working area. I 'm more confident in GIMP’s ability to respect an exact image size than in LO. I had trouble with drawings (built in Draw) pasted in Writer with different dimensions (and this is the same suite!).

In GIMP, you have a zoom which is equivalent to preview. You can also set “magnetic” guide lines to reliably align your pictures. In fact, you can build a template files with all your picture positions preset and ready to accept images exactly where you desire them.

@Livy I have touched a Windows box in years, so I don’t know what capabilities Paint has for print preview but I find it hard to believe that it wouldn’t have a such a feature, basic as it may be. Regarding LibreOffice Draw, just as a test, I did exactly what you’ve been doing in Word, that is, I placed four images in place on an A4, snapped to grid, resized to exact measurements (10x8 cm) and rotated if necessary, then exported to a PDF file in high res 300 dpi…all in less time than it’s taking me to respond. The right tools for the job. But as my friend’s grandfather used to say, “You want some advice? Do what you want.”

@Livy I will admit, if I read your original question correctly, is that LibreOffice Draw won’t import multiple images and automatically place them on a page…so, y’know…that’s that.

@ajlittoz as far as GIMP goes, again you’re absolutely correct BUT I still say in this case it’s killing flies with hand grenades. For the job you described, 100x40cm, avoiding moires, etc etc, yeah, ok. But Livy’s just putting as many images that will fit on an A4. Don’t overthink it! :slight_smile: GOOD NIGHT EVERYBODY!

GIMP is really complicated for my task. I tried to create grid and snap the image to grid… well, it is even more time consuming than dragging the image in Libre Writer itself. Besides, the print preview function is terrible, or maybe it is too hard to use and I don’t know how to use it properly yet. Looks like I have to stick with Microsoft Office this time.