Specifying Writable Area in Writer?

Hello,

I am using LibreOffice 7.3.7 and editing texts using Writer.

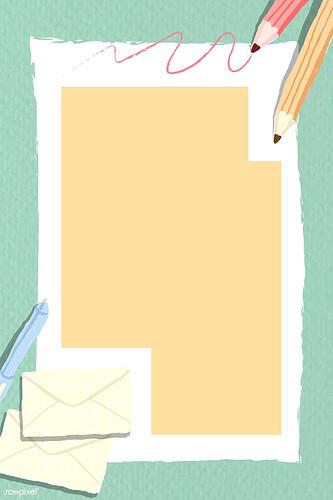
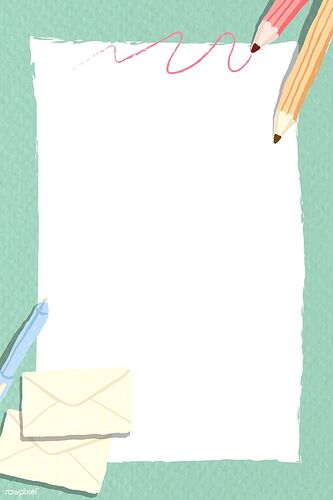
I inserted the 1st picture below as the background picture of a document. I am attempting to adjust the settings so that only the areas colored in light yellow in the 2nd picture below are writable. Specifically, I am attempting to ensure that the texts in the document never overlap with the visible parts of the background picture (i.e. the pencils on the top right corner and the envelopes on the bottom left corner).

How should I change the settings to either (1) specify that only certain areas on the page are writable or (2) specify that certain areas on the page are NOT writable?

You can use the header for your letters (you don’t need to write in them if you don’t want to) to anchor some objects to keep text out of those areas.

  • Click Format > Page Style select the Header tab and tick the box Header on
  • In the same dialogue, in the Page tab reduce the margins until only the pencil and envelopes intrude. The header can be in the red scribble if you won’t write in it.
  • Click in the Header and draw a rectangle large enough to cover the envelopes, set border to none, colour it white and reduce transparency to 99%.
  • In the sidebar, under Effect, set Soft Edge radius to 20pt
  • Set Wrap to Optimal
    *drag the rectangle over the envelopes
  • Copy rectangle over the intruding pencil and adjust to size
  • Right click each rectangle and select Position and Size. Set Anchor To Page, tick the box Protect position so you won’t accidentally move it.

Create a template
BackgroundImageTextArea.ott (67.5 KB)

1 Like

DON’T SET ANCHOR To Page! because it will attach the frame to a specific physical page. This is a common confusion between anchor and position.

If you anchor To page, the frame appears only on a single page. OP wishes to repeat it on every page. Consequently, anchor mode is To paragraph and position is tuned in Type tab of frame properties or style. Reference position will be Entire page.

Apparently, you anchored correctly in your example file. However, I think it is better to use frames instead of graphic shapes. Frames are more easily controlled and allow for more sophisticated effects.

1 Like

Too true, anchor to paragraph.

I was looking at the letter and thought it is more likely that the second and subsequent pages would just have the green border. With a different first page it would be suitable to have the objects anchored to the page.
I removed that alternative but didn’t edit it fully to remove the change.
I should have considered a borderless frame, it is much more convenient.

Even with a single so-decorated page, To page anchor is not the right choice because editing before the page, even in different page styles, may move everything. The “decoration” will remain on the physical page and become “detached” from its target page.

I won’t consider To page even for the very first page of a book. I prefer to have a predictable way to find and edit the decoration by having it anchored To paragraph in a specific page style (header or footer).

I have to disagree; with a letterhead there is never any previous page. The frames could be anchored to the header if that were set to different first page but there is the same risk of changes altering the layout.
In the attached sample the frames are anchored to page on first page only as they are not required for subsequent pages. Uses Google font Comic Neue as it is appropriate for the image
BackgroundImageLetterhead&Subsequent2.ott (84.5 KB)

I disagree in this point (see also @EarnestAl 's reply)… E.g. for FirstPages of business letters anchoring of frames to page avoids to overload the header (or footer) and is easy to do. The frames don’t show on subsequent pages. - Cheers

I experimented with your attached template: I imagined there is a situation where I need a page before First Page. So I added a page before it (Default Page Style), which could be an “envelope”, and the frames were kept on page 1, though they were anchored in the header (therefore assuming they will be kept with First Page header). And the second page styled First Page no longer had the frames with it. Page 3, which is again a Default Page Style page, had not the frames either.

It seems also that anchoring To page detaches the anchor from text-related stuff: it didn’t trigger header in Default Page Style and the anchor is indeed the page independent of any contents.

On the contrary, if I anchor To paragraph (in the header), the frames remain in First Page header style and follow edit history.

So, even in the case of a letterhead (decoration not repeated on subsequent pages), it is safer to anchor To paragraph.

To page should be reserved for page-oriented work. Usually, Writer documents are flow-oriented (a letter belongs in this category as pages will be allocated to accommodate contents size) and creating page-priority documents is always tricky because pages are always automatically added in case you overflow. Applications like Scribus or Quark XPress are better fit for that.

@ajlittoz , OP wishes to repeat it on every page.

Where can i find this statement?


@Carl2333 , can you please specify. Thank you.

@Hrbrgr
It seems to me implicit according to

I inserted the 1st picture below as the background picture of a document.

through the use of “of a document”. I think he would have written “of a/the page” if it were for a single occurrence. In addition the rather nice background looks like stationery, not letterhead. I have already seen scratchpads for kids printed likewise.

There is also the word “background” which applies to page styles and a background is repeated on every page.

Of course, an explicit specification would be much better.

@ajlittoz , i didn’t understand it explicitly either.
I only asked because I would have a solution for a single letterhead, but not necessarily for multi-page letters. Perhaps OP will comment on this point.

@ajlittoz you are absolutely right of course, but I can’t resist digging myself into a hole :slight_smile:

For the envelope, we can create one separately but continue the design. Knowing that printers can’t print to the edge, there is a DIY solution. The edge flaps fold back first, then fold back the bottom flap and glue to edge flaps, finally fold back top flap and secure with tape (there is only 7 mm to spare)
MatchingDLEnvelope.odt (44.1 KB)

@EarnestAl Very nice design indeed!